Podology: client photos, treatment course and AI review
Client files are in the “Podology” tab of the client card: “Take a photo” or “Choose from gallery”. Medical history is the “Questionnaire” button. Consultation notes are “What was done at the visit” and “Advice for the client”.
Diese Lektion gibt es vorerst auf Englisch — die Übersetzung kommt.
Turn on podology
The salon owner does this in the owner account (app.citamate.com). After that, every client card gets a “Podology” tab.
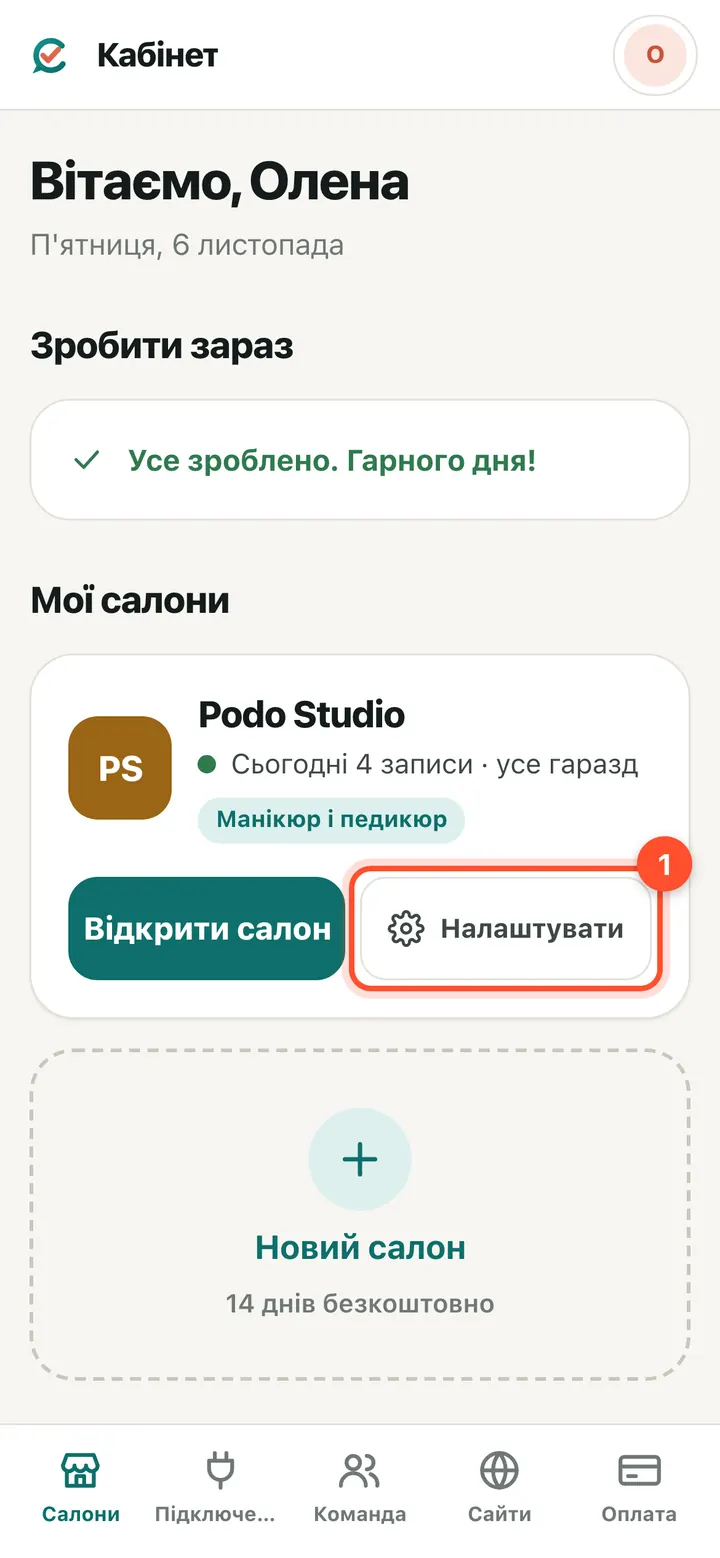
Owner account → “My salons” → next to the salon, press “Settings”.
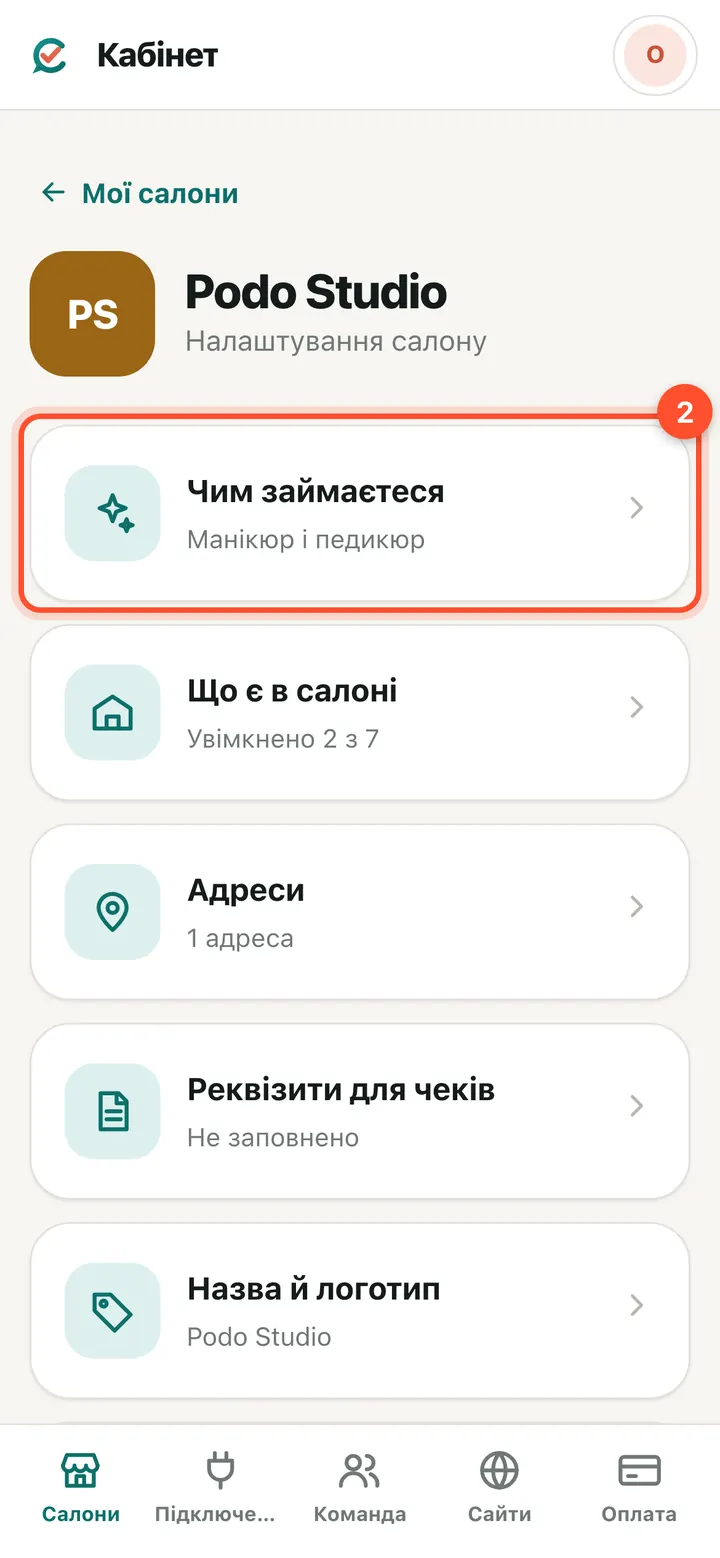
The “What you do” tile.
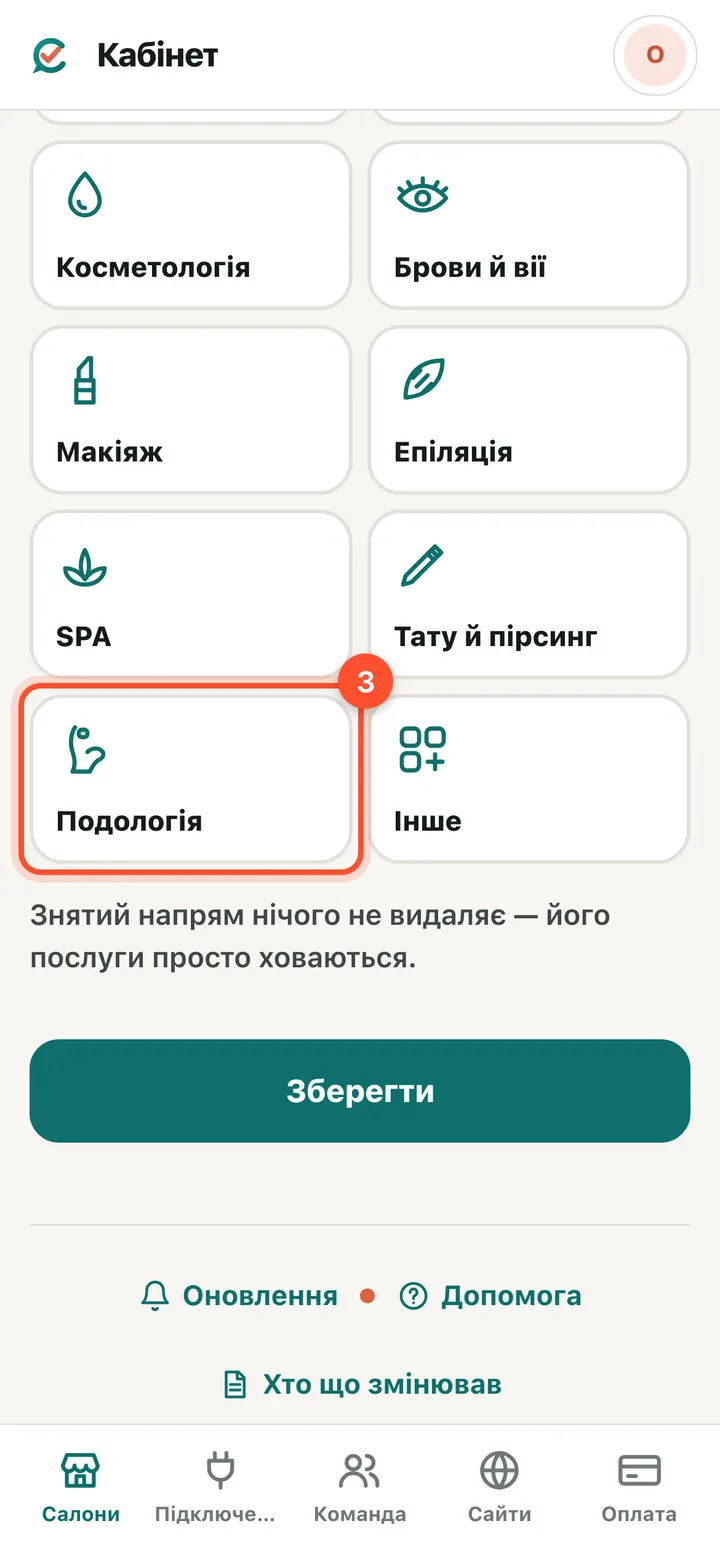
Tick “Podology”.
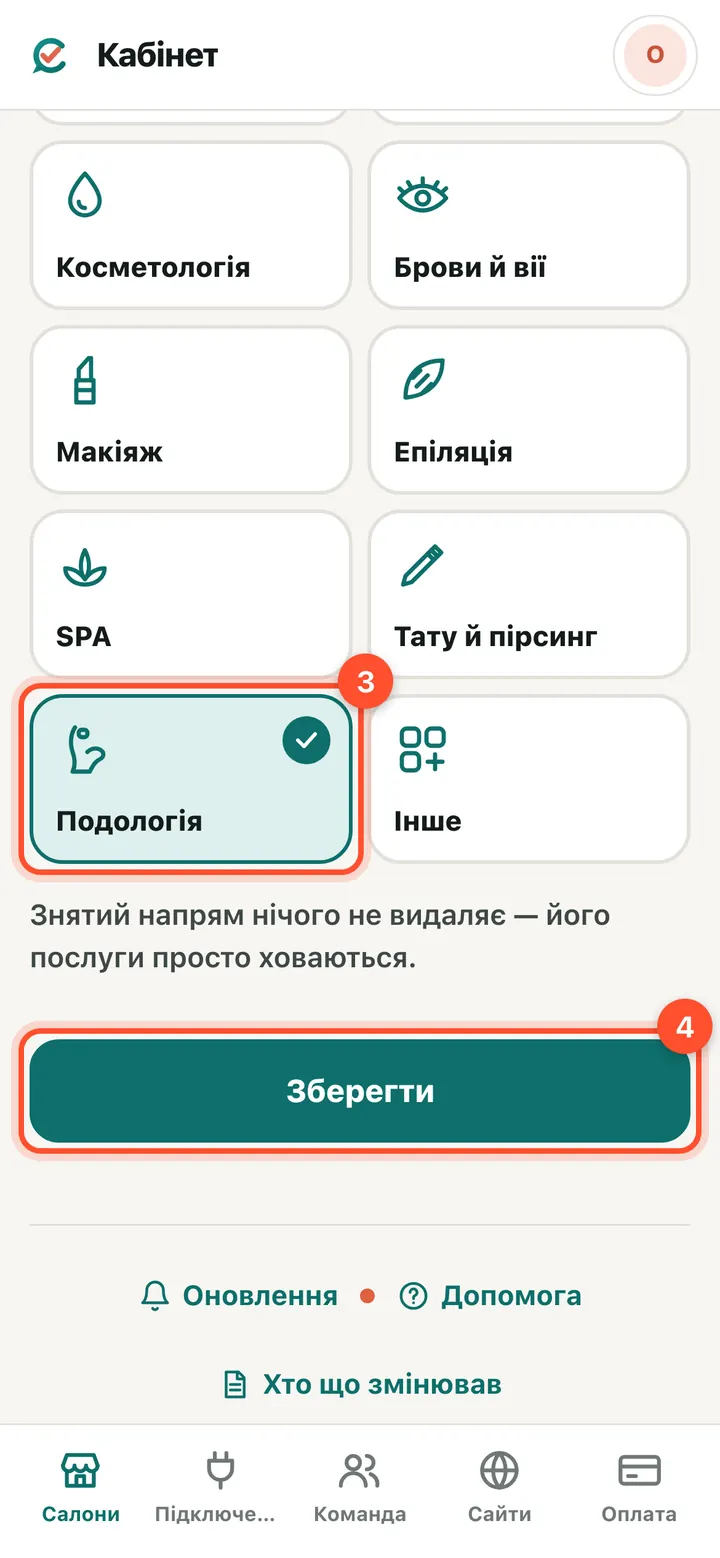
Press “Save”.
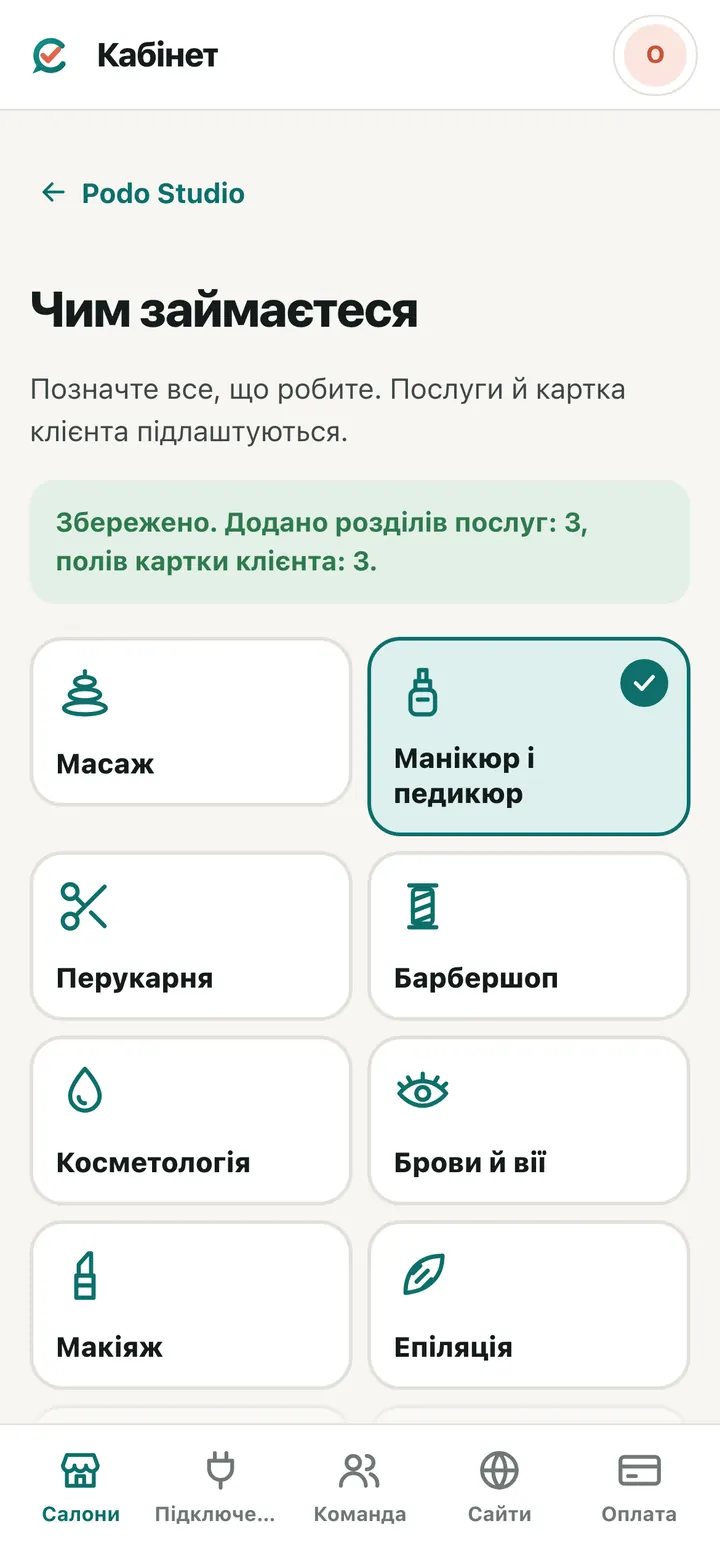
Done. Podology service sections are added (set the prices yourself), the client card has a “Podology” tab and the questionnaire asks about diabetes, fungus and blood thinners. You can also do this in the salon panel: “Salon” → “What you do” → “Edit”.
From the schedule — the client came for the booking
The quickest way during the appointment: the photo is linked to this visit straight away.
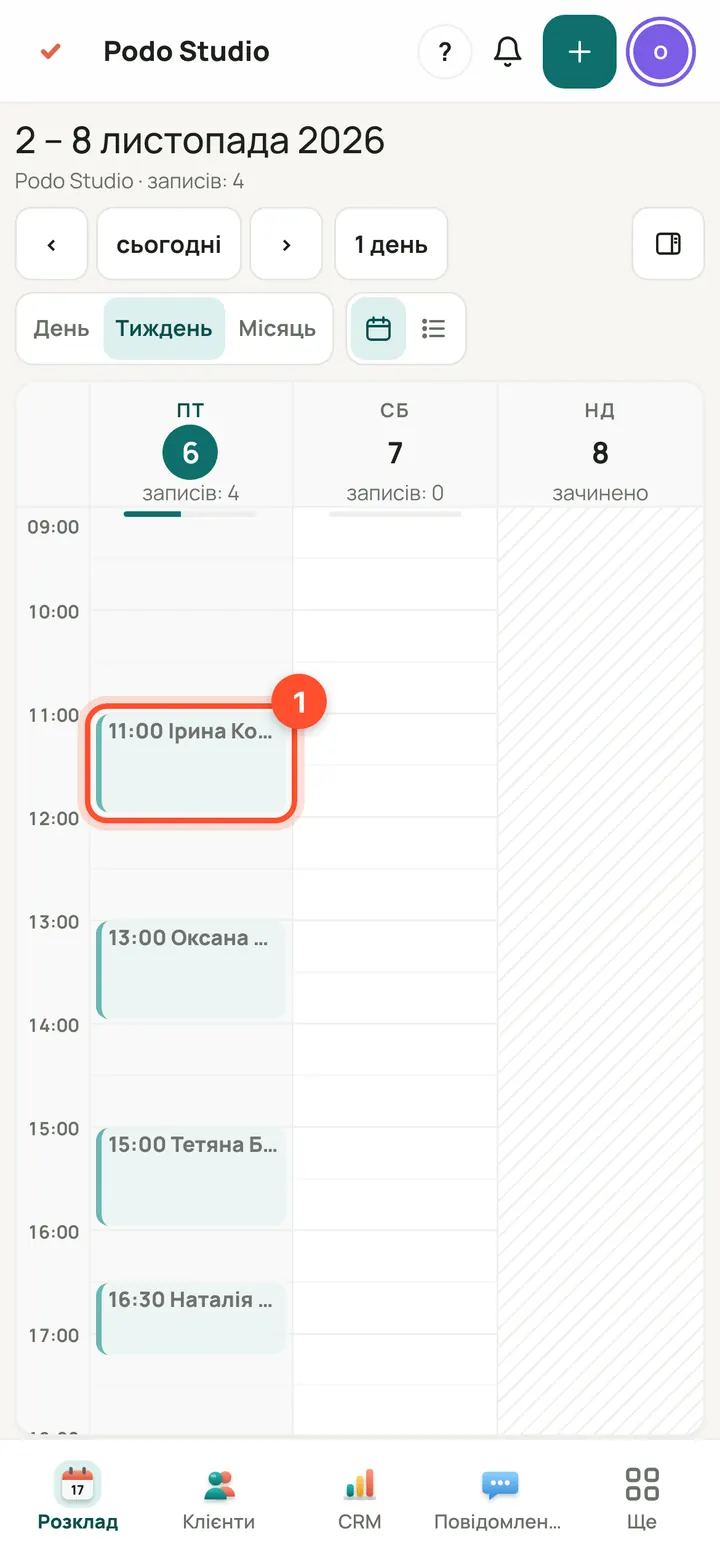
“Schedule” → tap the client's booking.

In the booking window, press “Podology”. The button is there if the service is in a podology section or the client already has a course.
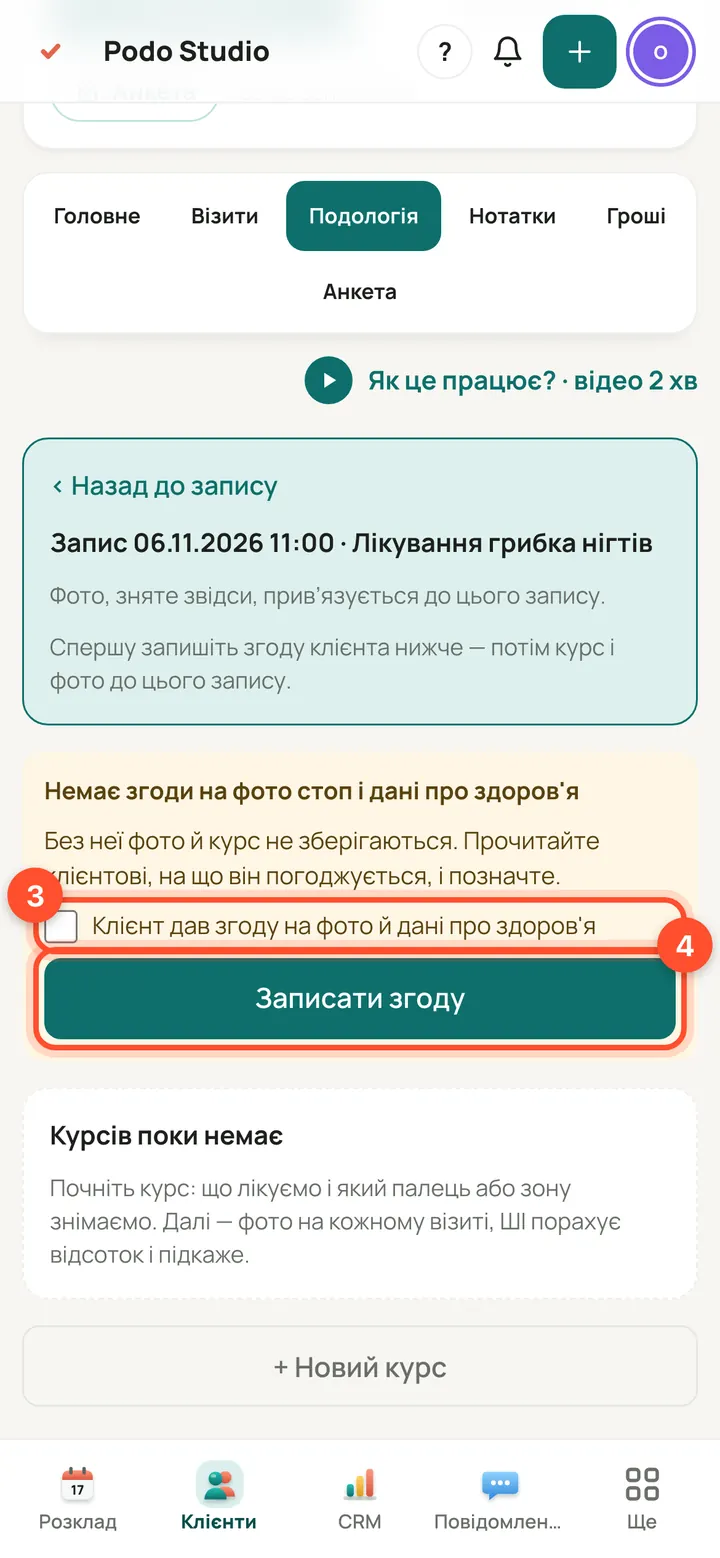
The first time for a client: read the consent to them, tick the box (3) and press “Record consent” (4). Without consent photos are not saved. Only once.

Press “+ New course for this booking”. A course is what you are treating; all photos go into it.
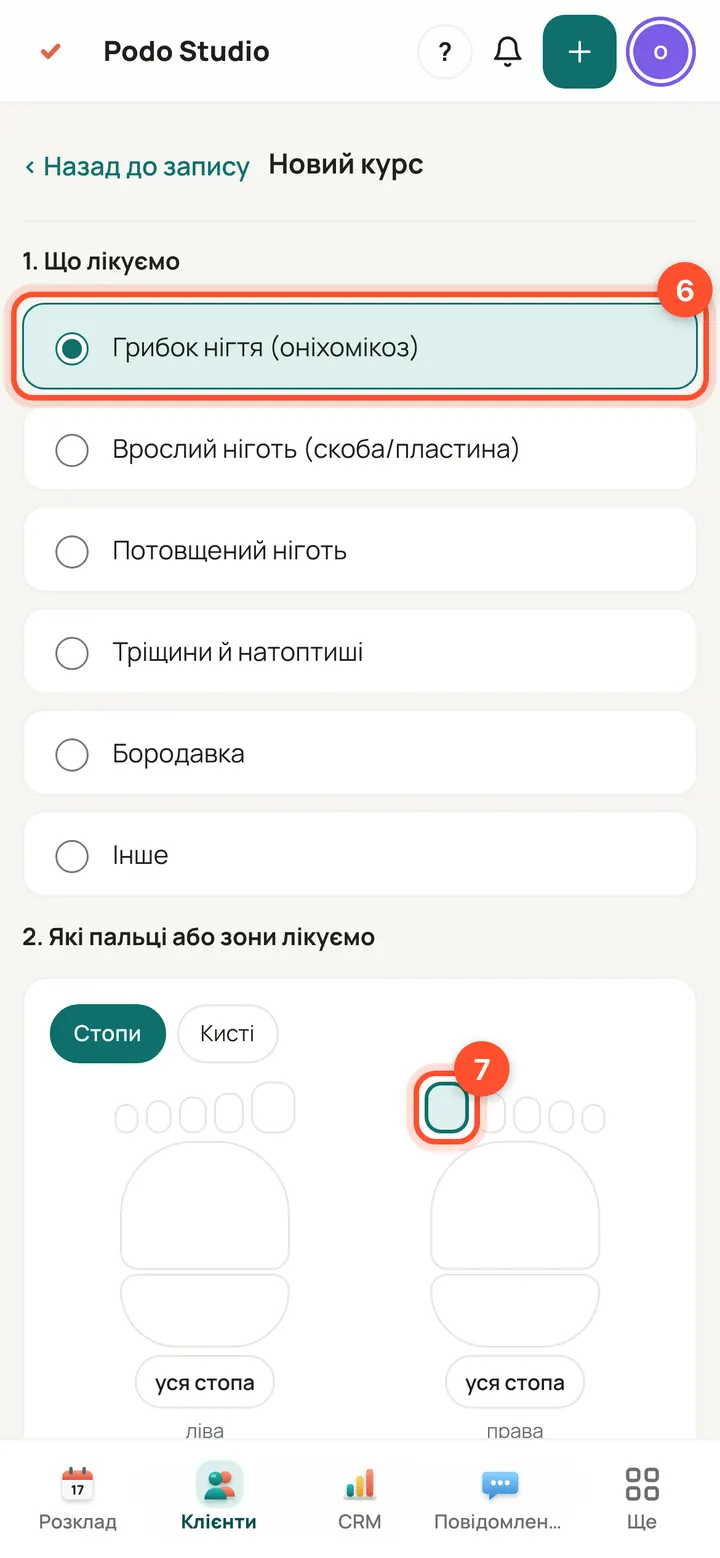
Choose what you treat (6), mark the toe or area on the diagram (7) and press “Start the course” (8). You can mark several toes.
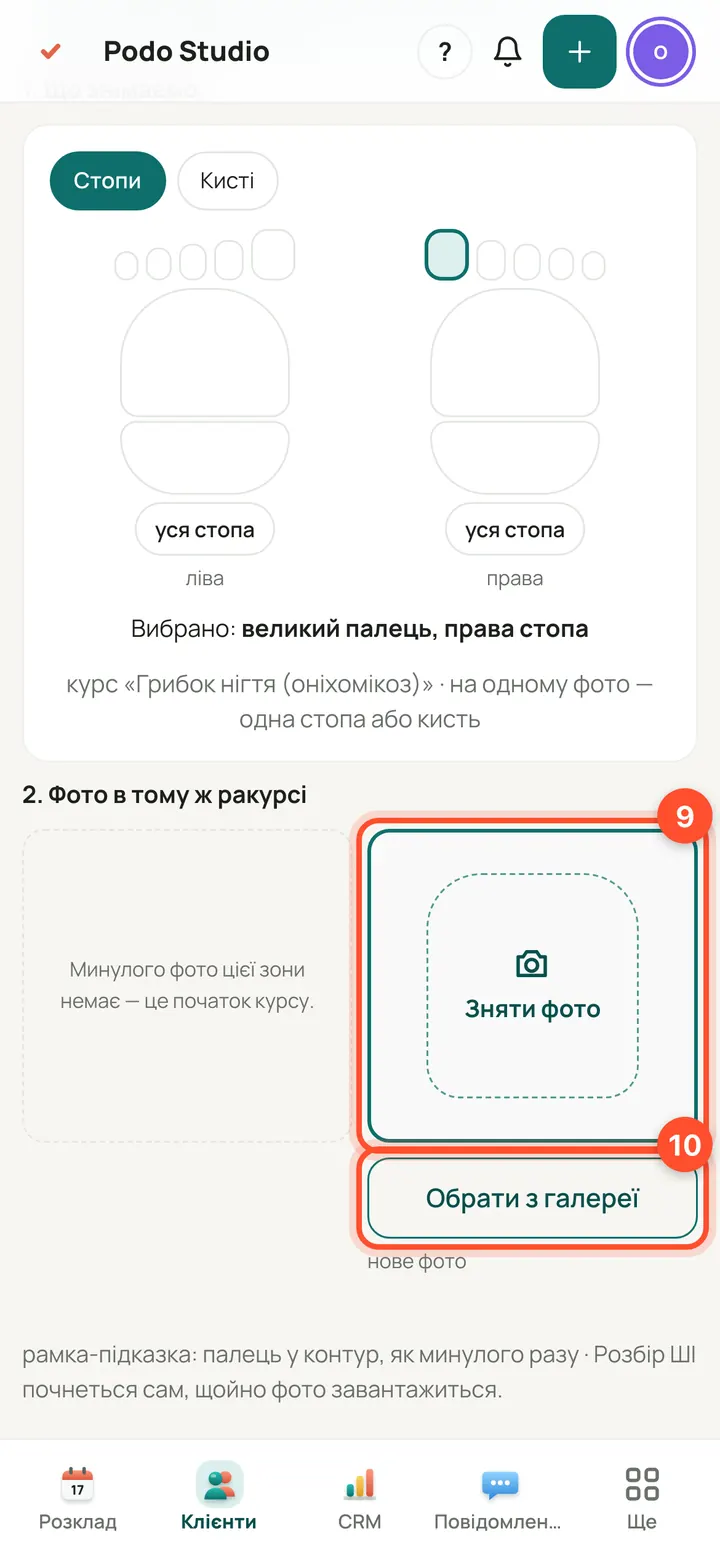
“Take a photo” (9) opens the camera. “Choose from gallery” (10) is a photo already on your phone or computer. This is how you add a file to the client card.
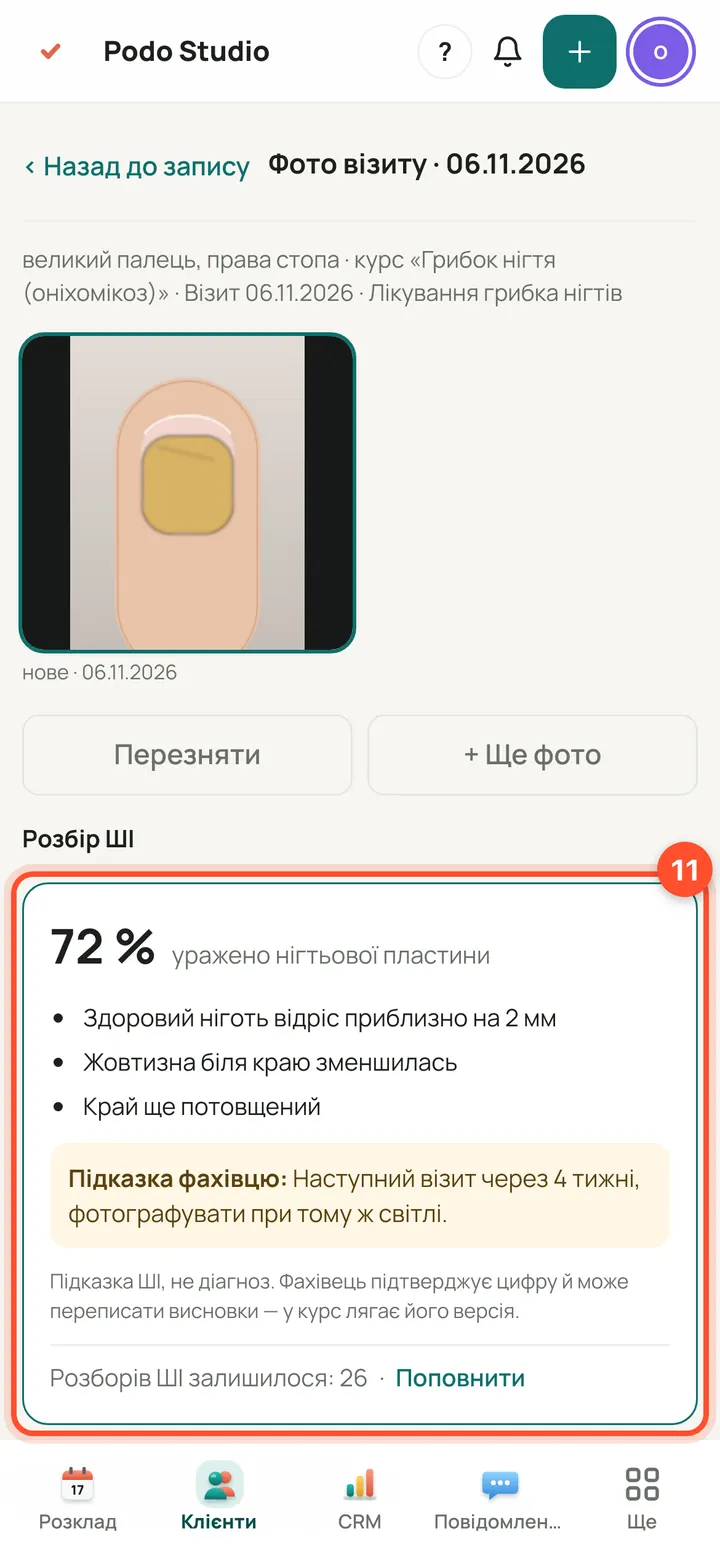
In a few seconds the AI shows the affected percentage and a hint (11). It is a hint, not a diagnosis: you can correct the number.

Write what was done during the visit (12) and advice for the client (13). Press “Save and back to the booking” (14) and you are back in the schedule.
From “Clients” — history or a photo without a booking
Handy before an appointment or between visits: the whole treatment on one screen.

Open “Clients”.
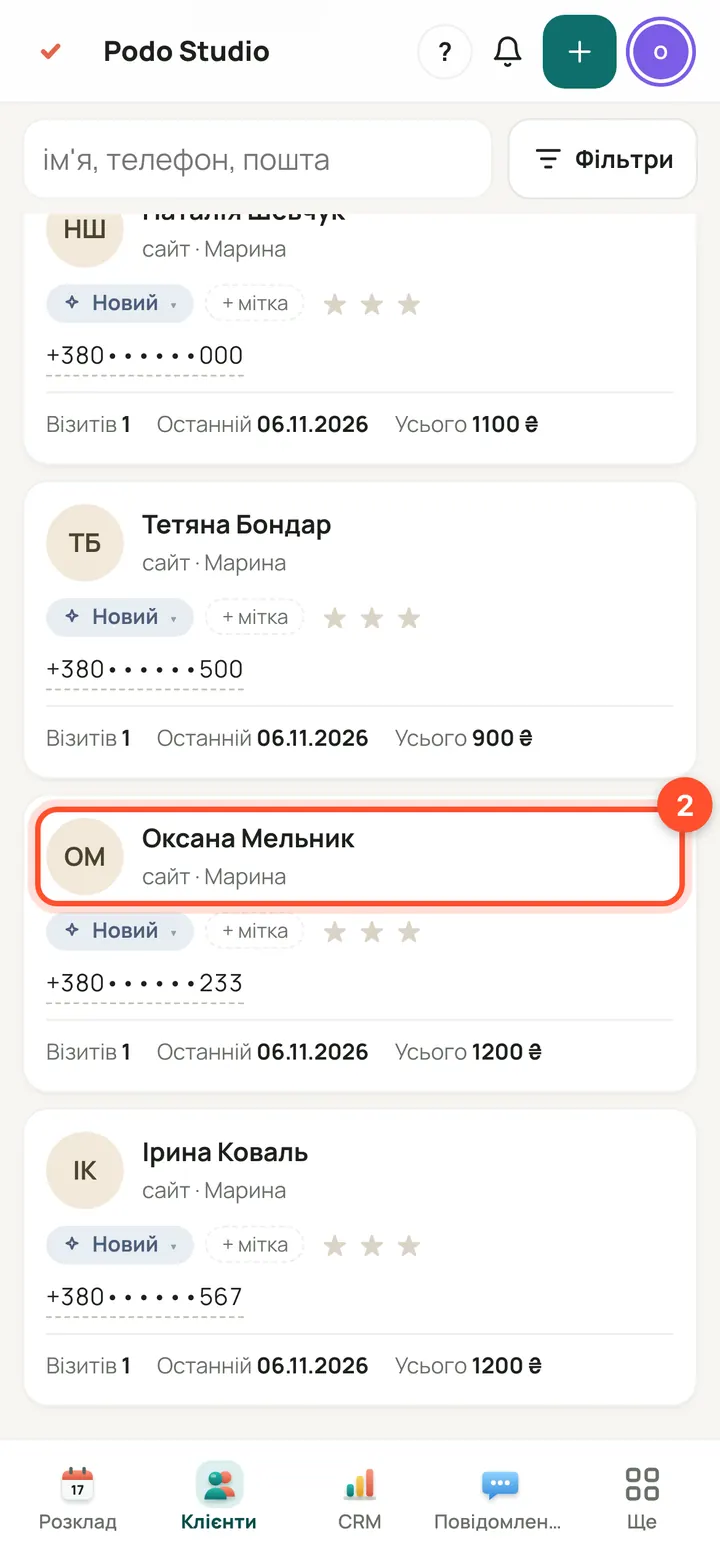
Find the client by name or phone and open the card.

The “Podology” tab. Next to it is “Questionnaire” with the client's medical history.
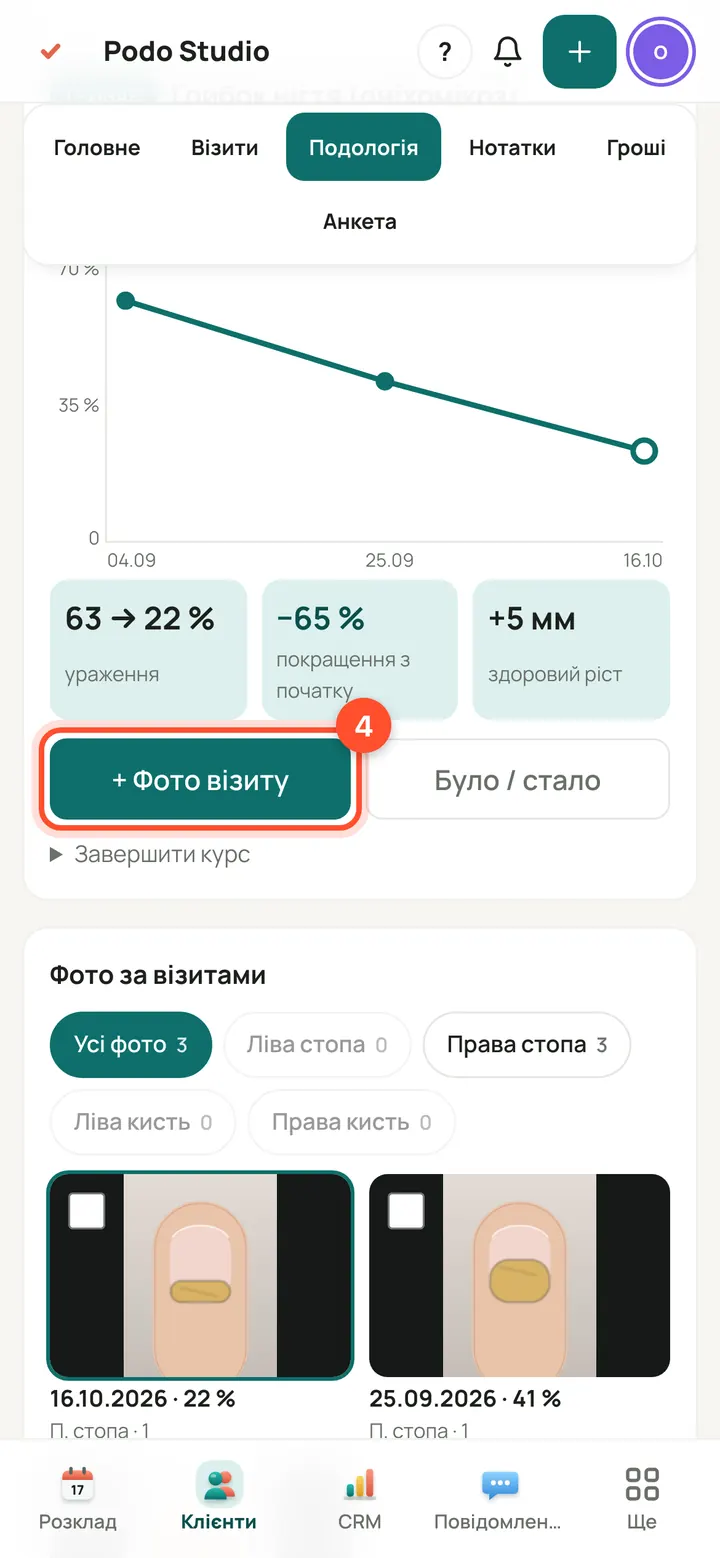
The course, the chart and all photos by visit. “+ Visit photo” (4) adds a new photo: then the same steps 9–14.
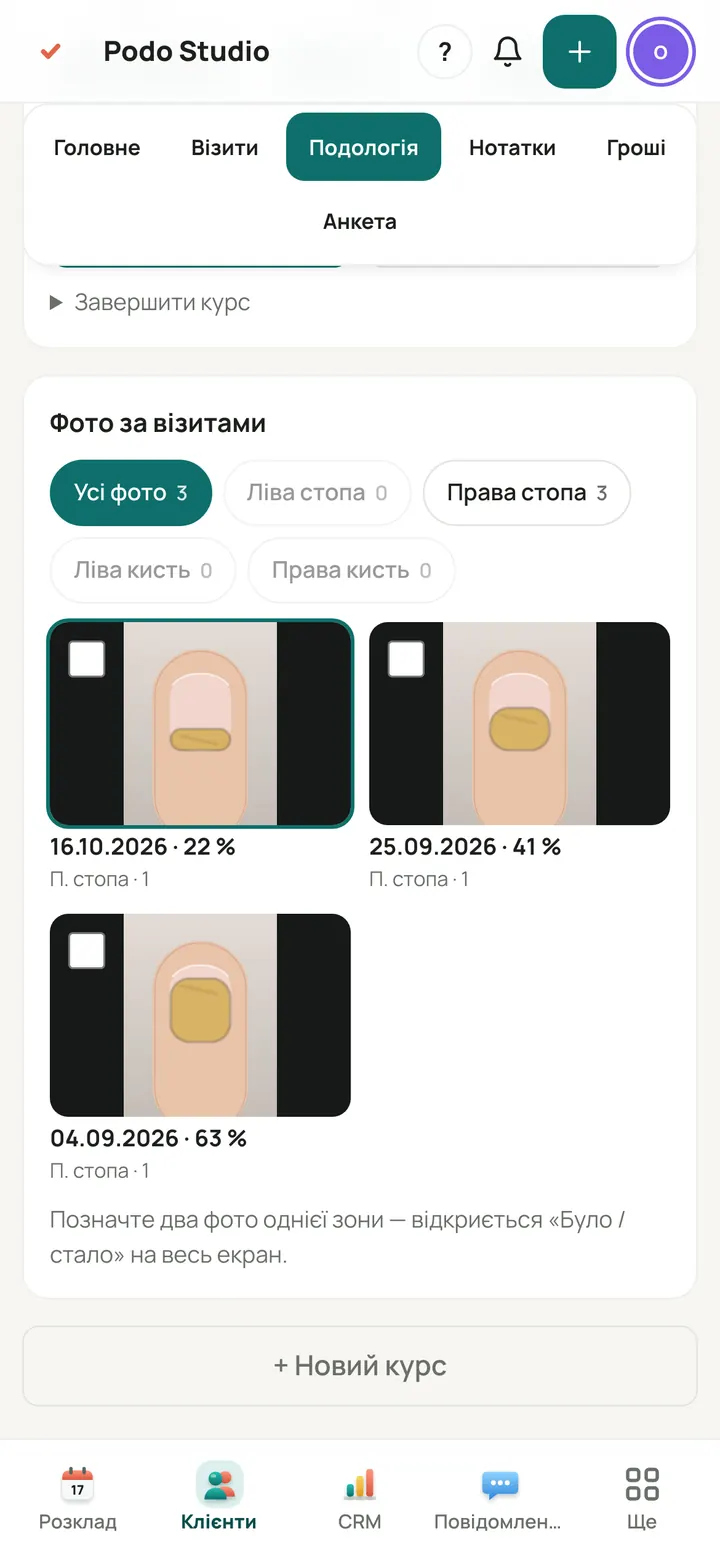
Photos by visit: filter by foot or hand. Tick two photos of the same area to open “Before / after”.
Fragen
Where is the medical history?
In the client card: the “Questionnaire” button (diabetes, fungus, blood thinners, wounds) and the fields on the “Main” tab. The client can fill in the questionnaire by link.
Does the client see the photos?
No, until you turn it on: the “Client sees progress in their account” switch on the tab or the tick under a visit. The client never sees AI hints.
Can I add a PDF or a document?
Not yet — photos only (JPEG, PNG, WebP; on a phone, any photo from the gallery).
How much is an AI review?
30 reviews a month are free. Then packs: 100 reviews for €1, 500 for €2, 1000 for €3 (+ VAT where it applies). The balance is shown under each review.
Who sees the tab?
The owner, a manager with access to clients, and a specialist for their own clients.
Probieren Sie es selbst — 14 Tage kostenlos
Alles aus dieser Lektion funktioniert ab dem ersten Tag.
14 Tage kostenlos starten