Cosmetology: before / after photos
Booking → “Before / after photos” → “Take BEFORE photo” or “From gallery” → “Take AFTER photo” → “Done!”. In “Photos”, tick “To client” on the photos the client will see.
Turn on cosmetology
The salon owner does this in the owner account (app.citamate.com). After that, every booking has a “Before / after photos” button.
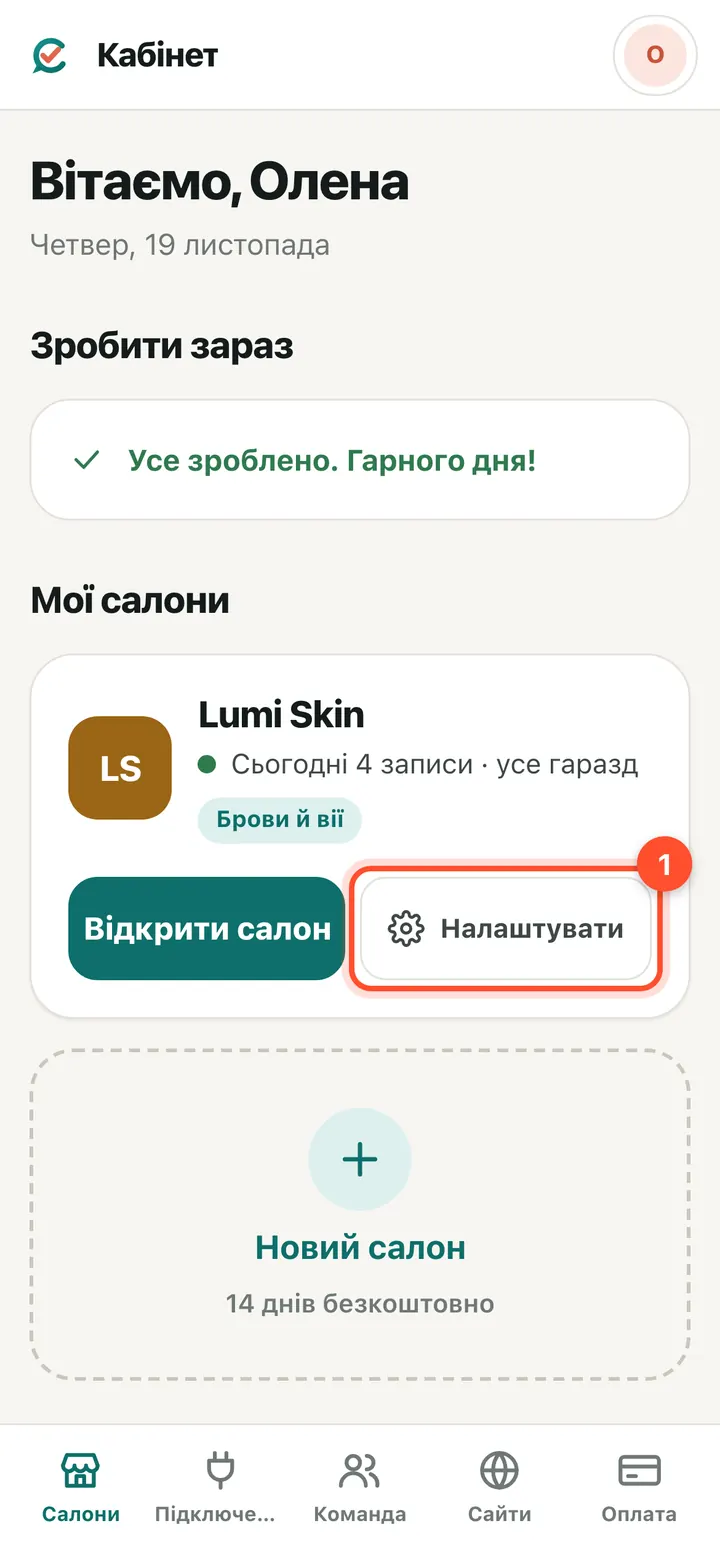
Owner account → “My salons” → next to the salon, press “Settings”.
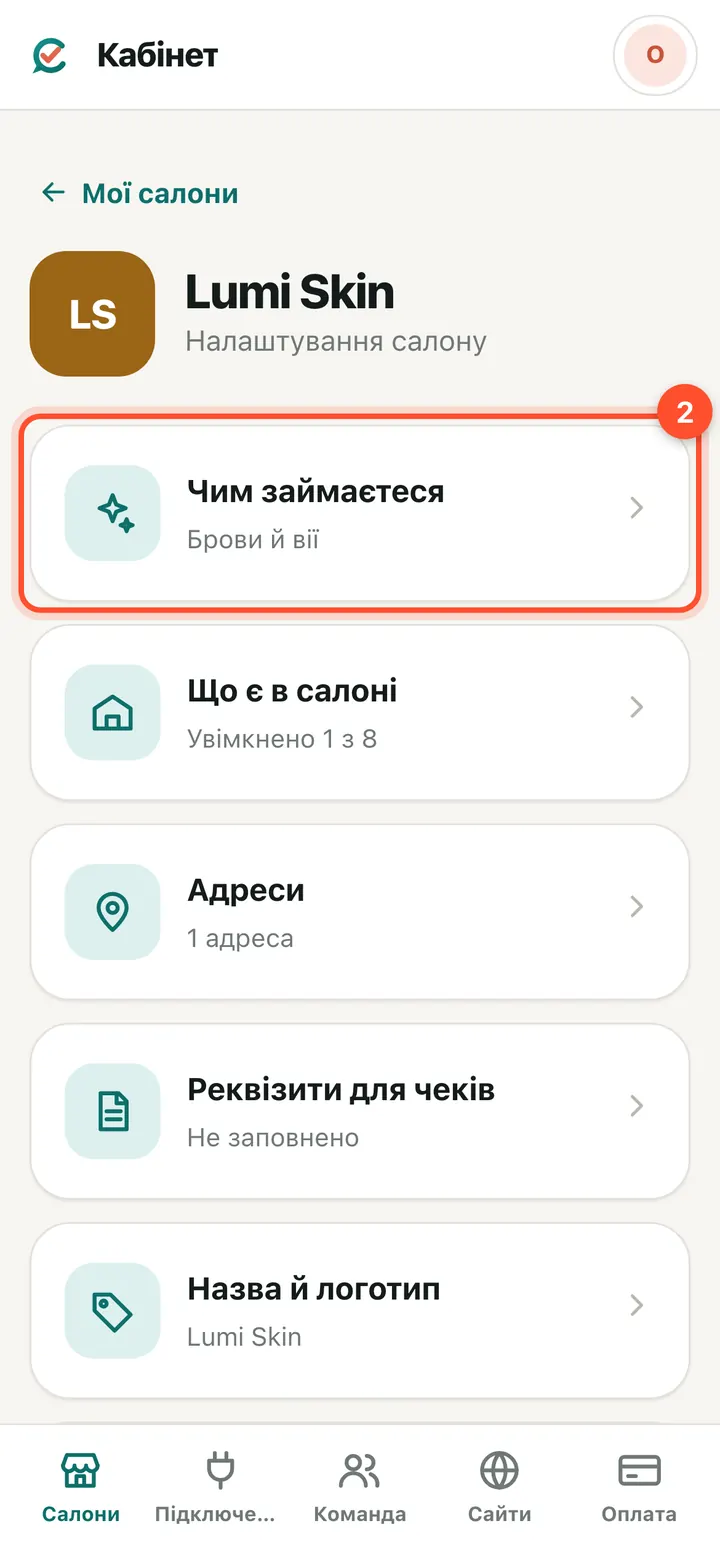
The “What you do” tile.
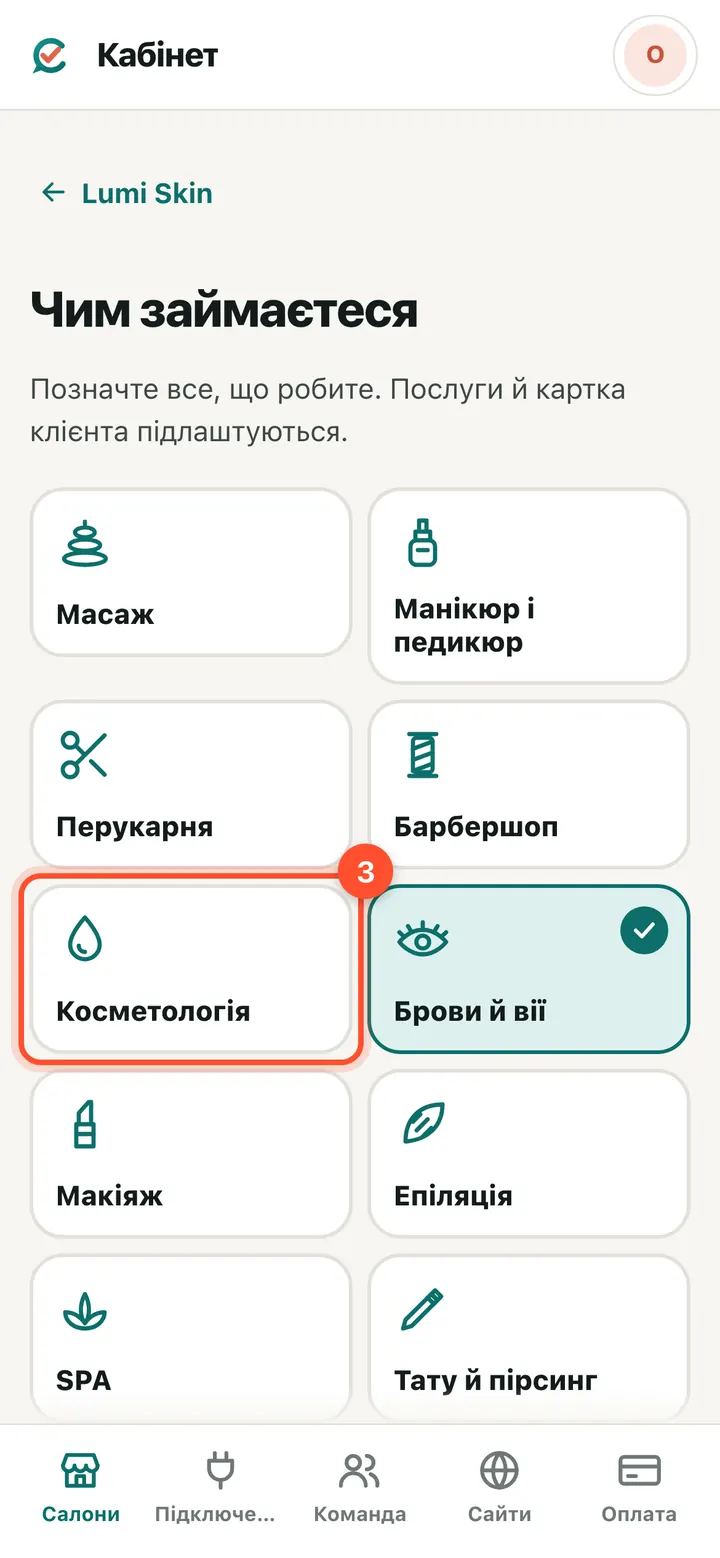
Tick “Cosmetology”.
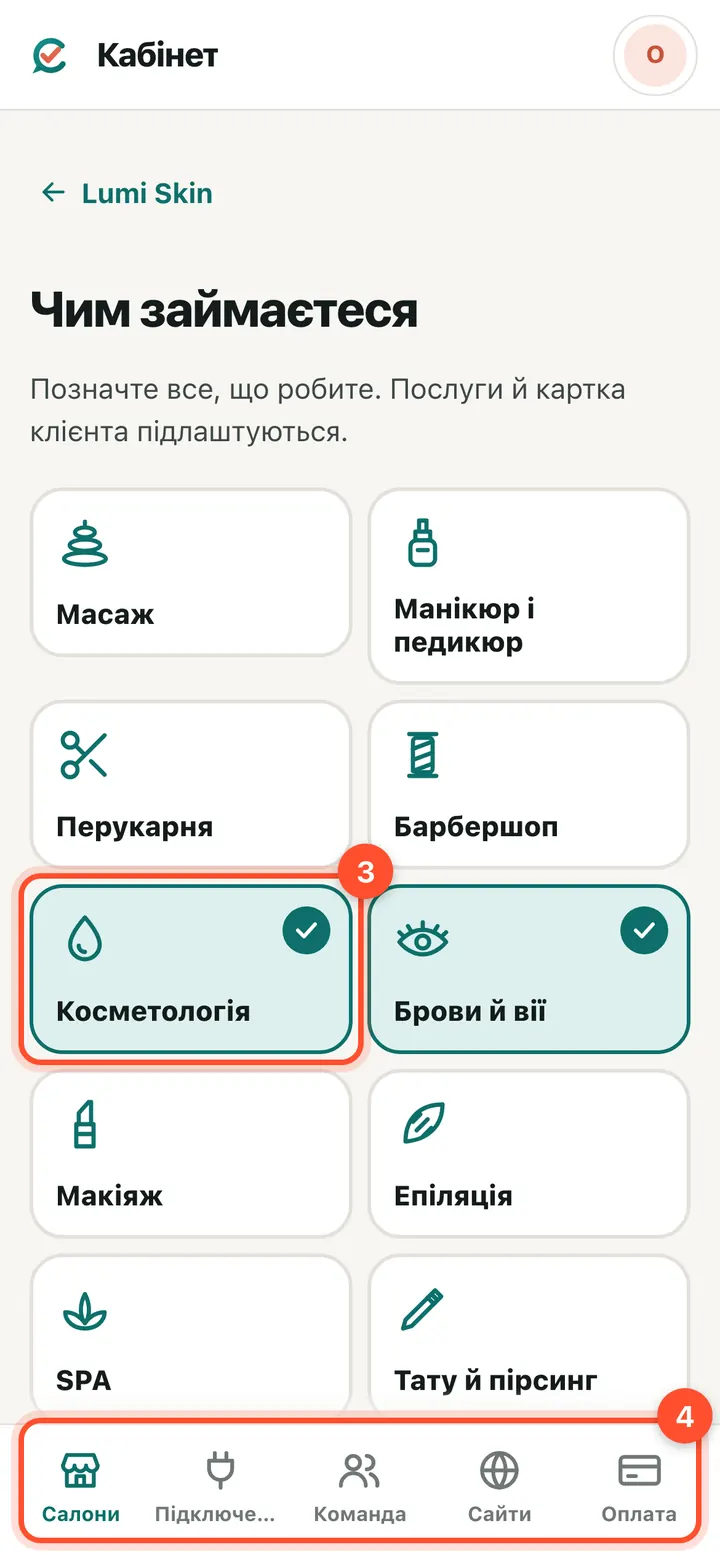
Press “Save”.
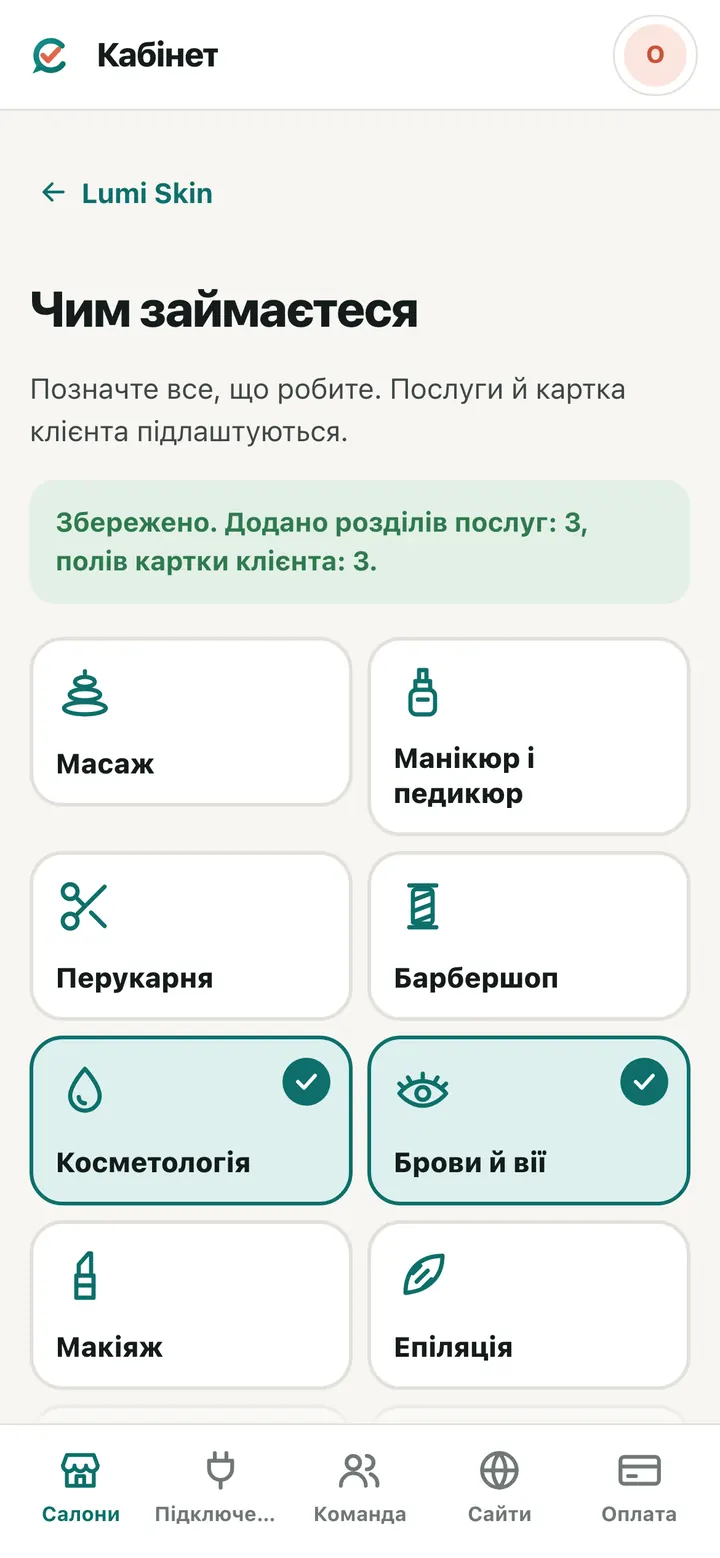
Done. Bookings now have a “Before / after photos” button, the client card has a “Before / after photos” tab, and the menu has “How I work with photos” and “My work”.
Before and after photos — right in the booking
Three steps: before photo → treatment → after photo. Nothing to fill in — the before / after pair is saved on its own.
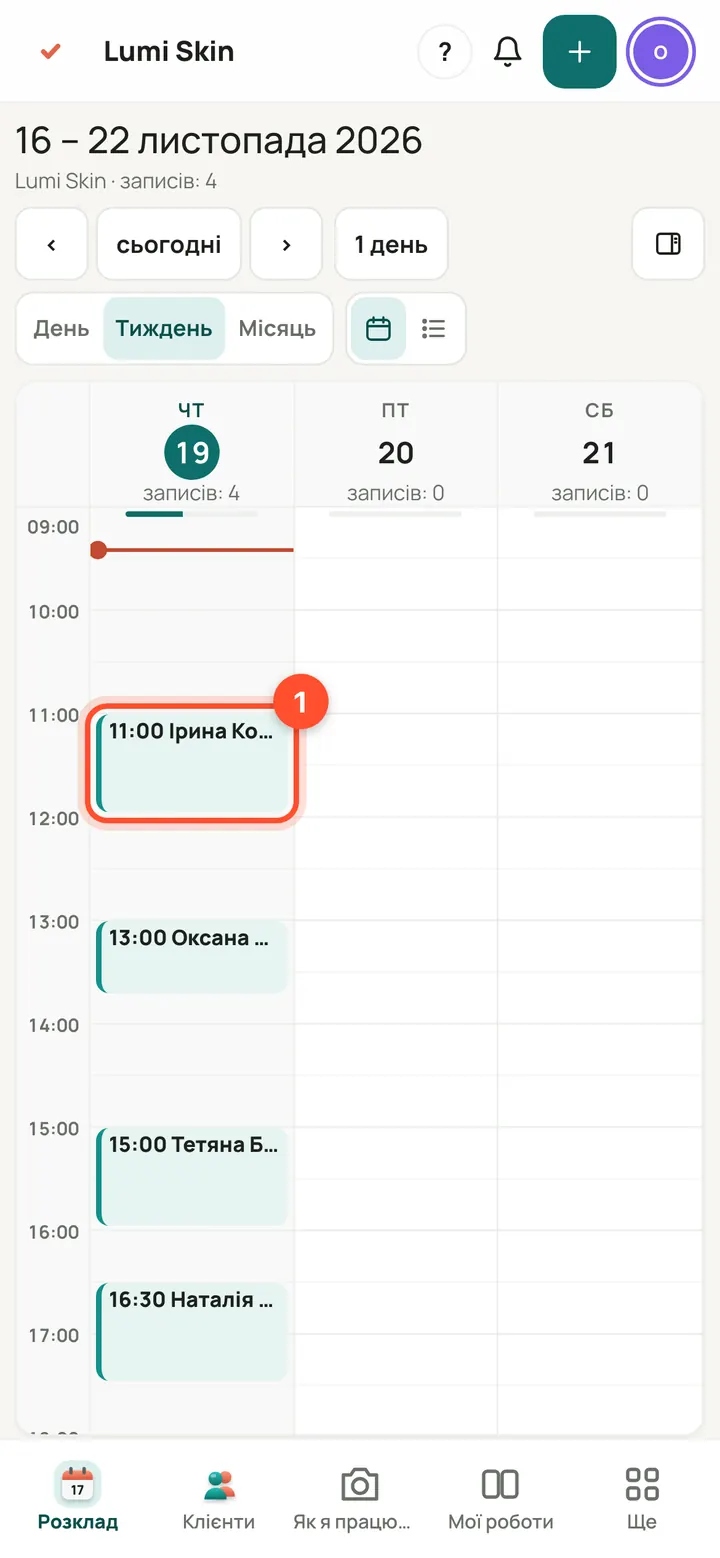
“Schedule” → tap the client's booking.
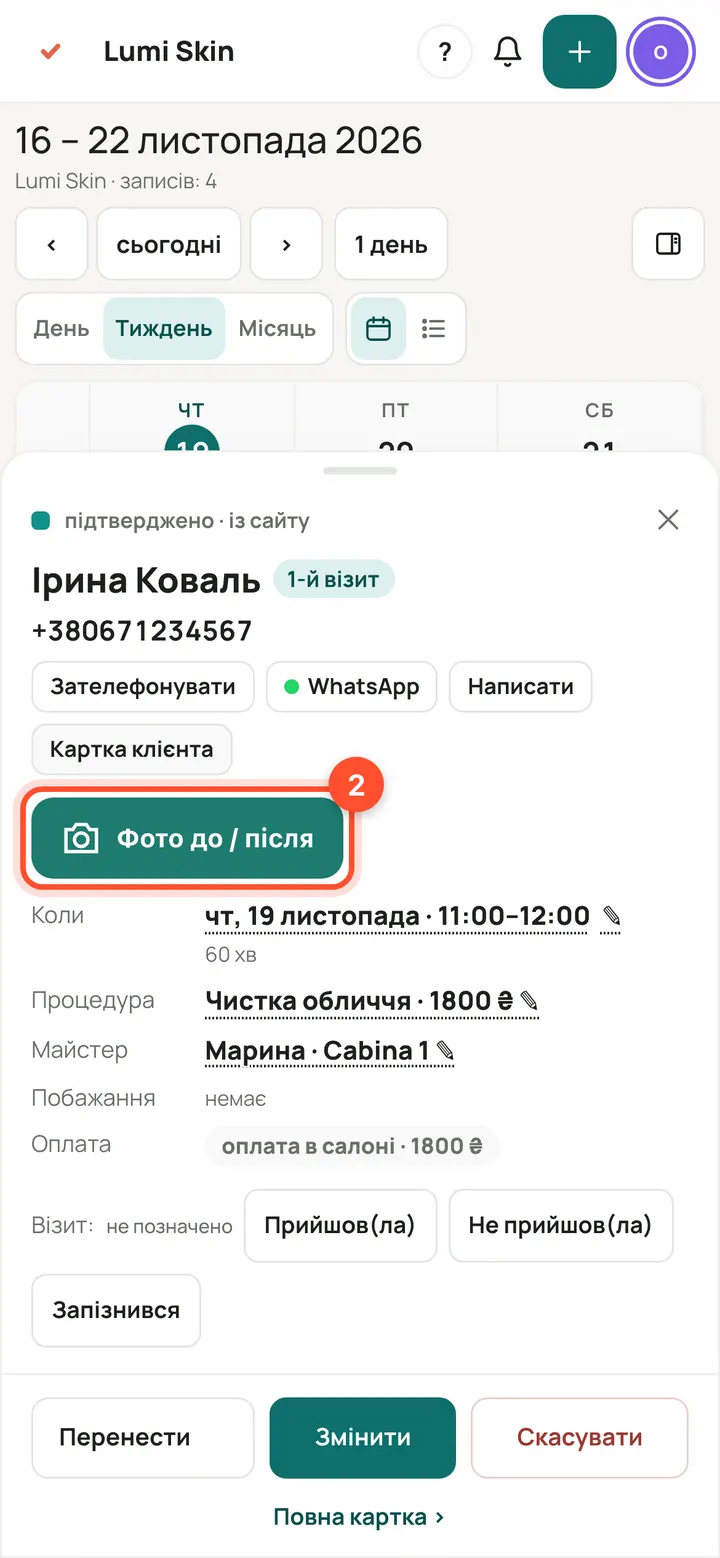
The “Before / after photos” button.
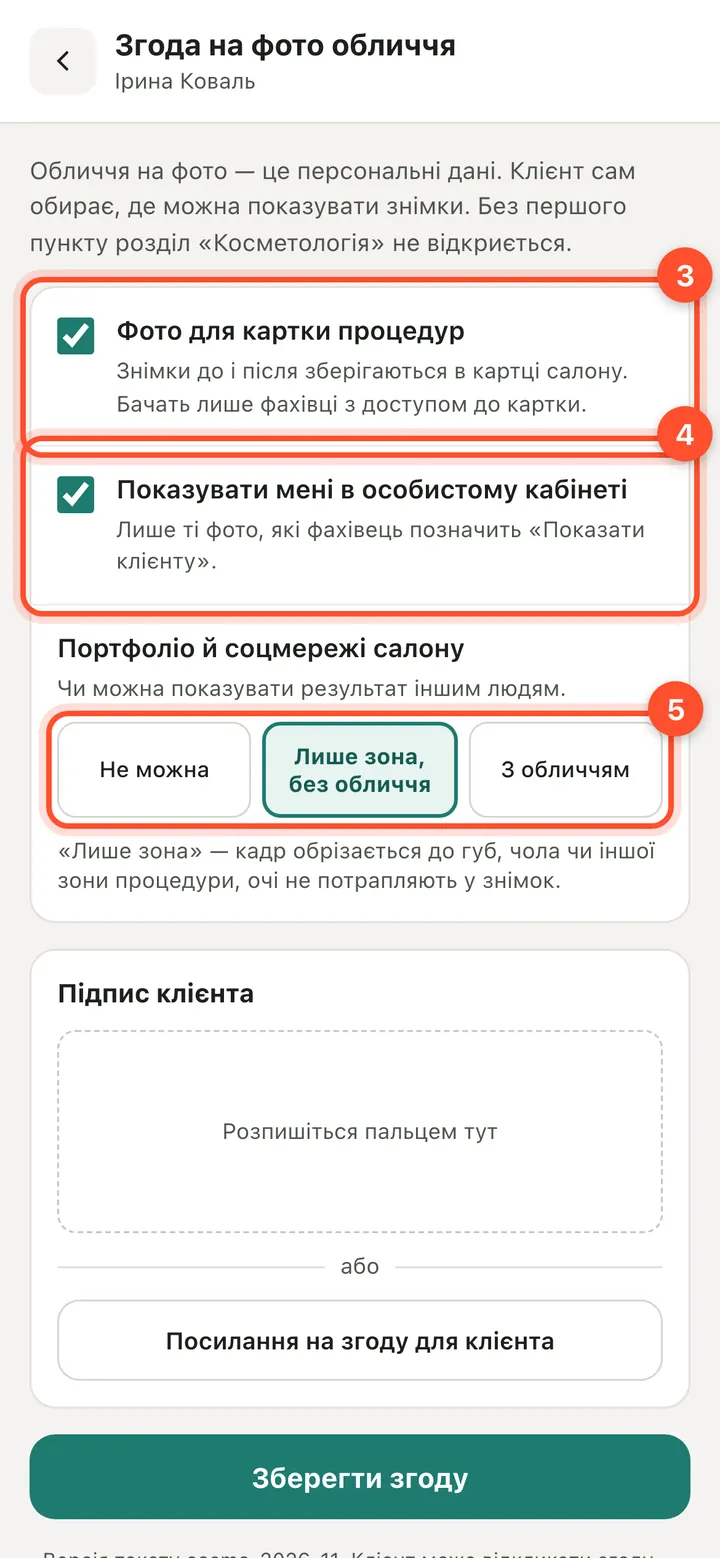
The first time, you need the client's consent. Tick “Photos for the treatment record”. “Show them to me in my account” — if the client wants to see the photos herself. Below: may the result go into your portfolio.
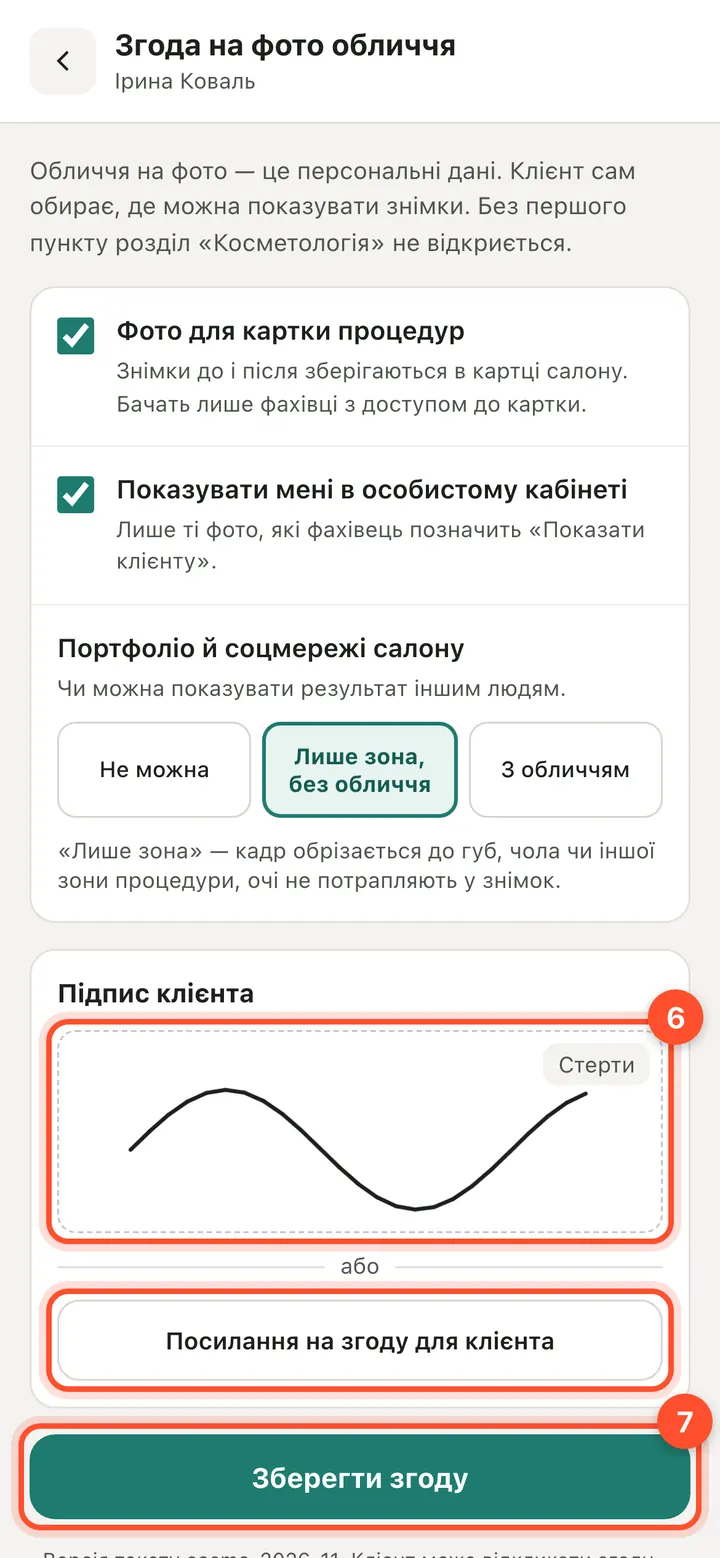
The client signs with her finger on the screen → “Save consent”. Not next to you? “Consent link for the client”: she opens it on her phone and signs. You only do this once.
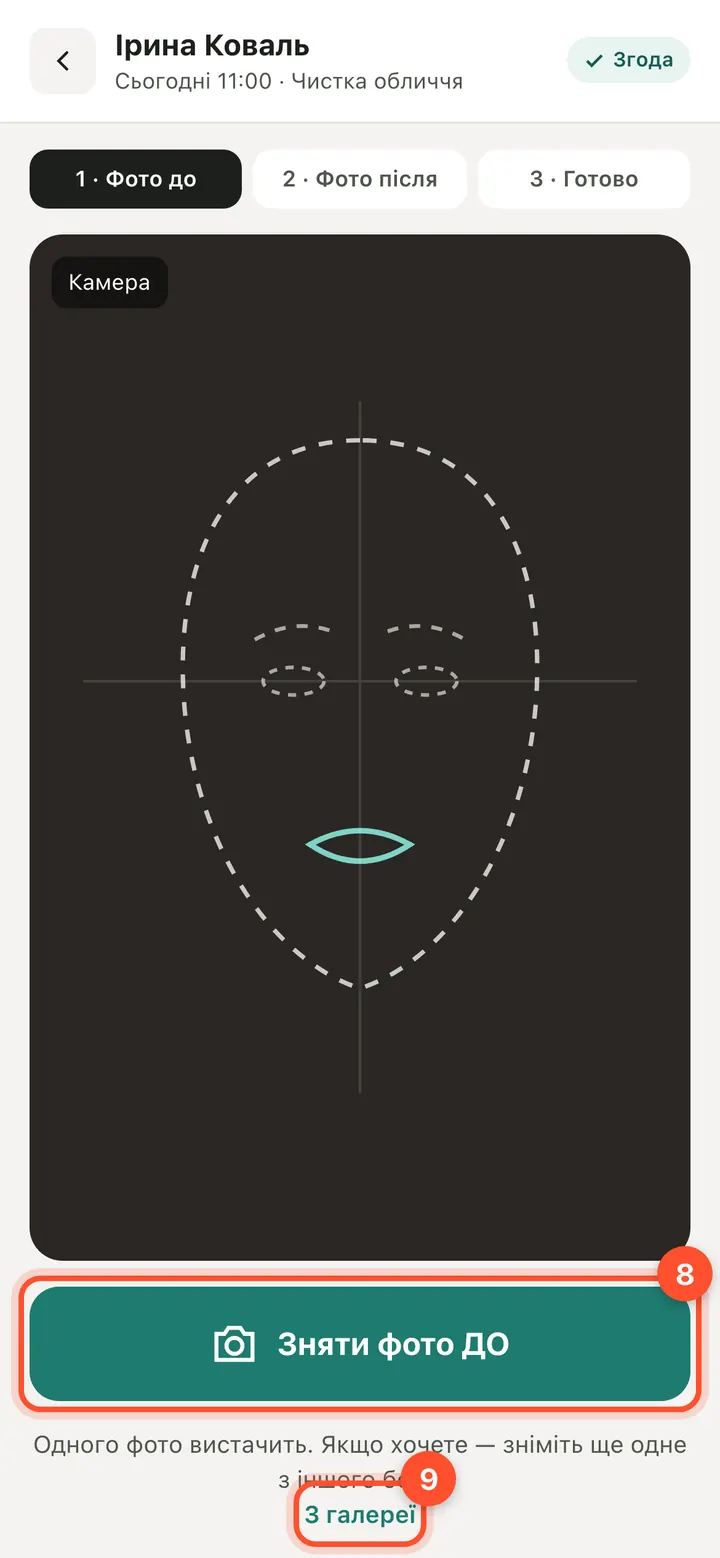
Step 1 — “Take BEFORE photo”: the camera opens right on the page. Or “From gallery” — you can pick several photos at once.
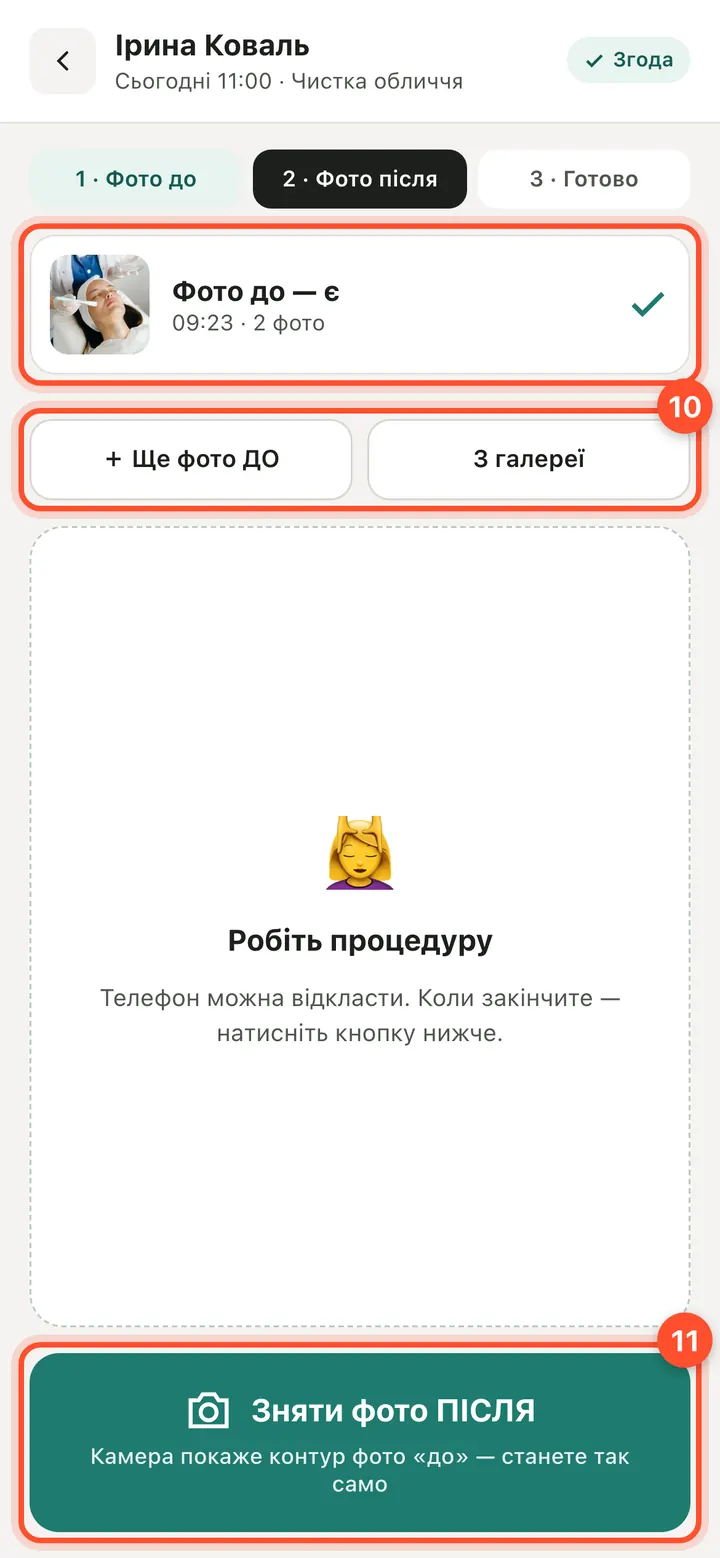
Step 2. The before photo is there. Need more? “+ More BEFORE photos” or “From gallery”. Do the treatment, then “Take AFTER photo”.
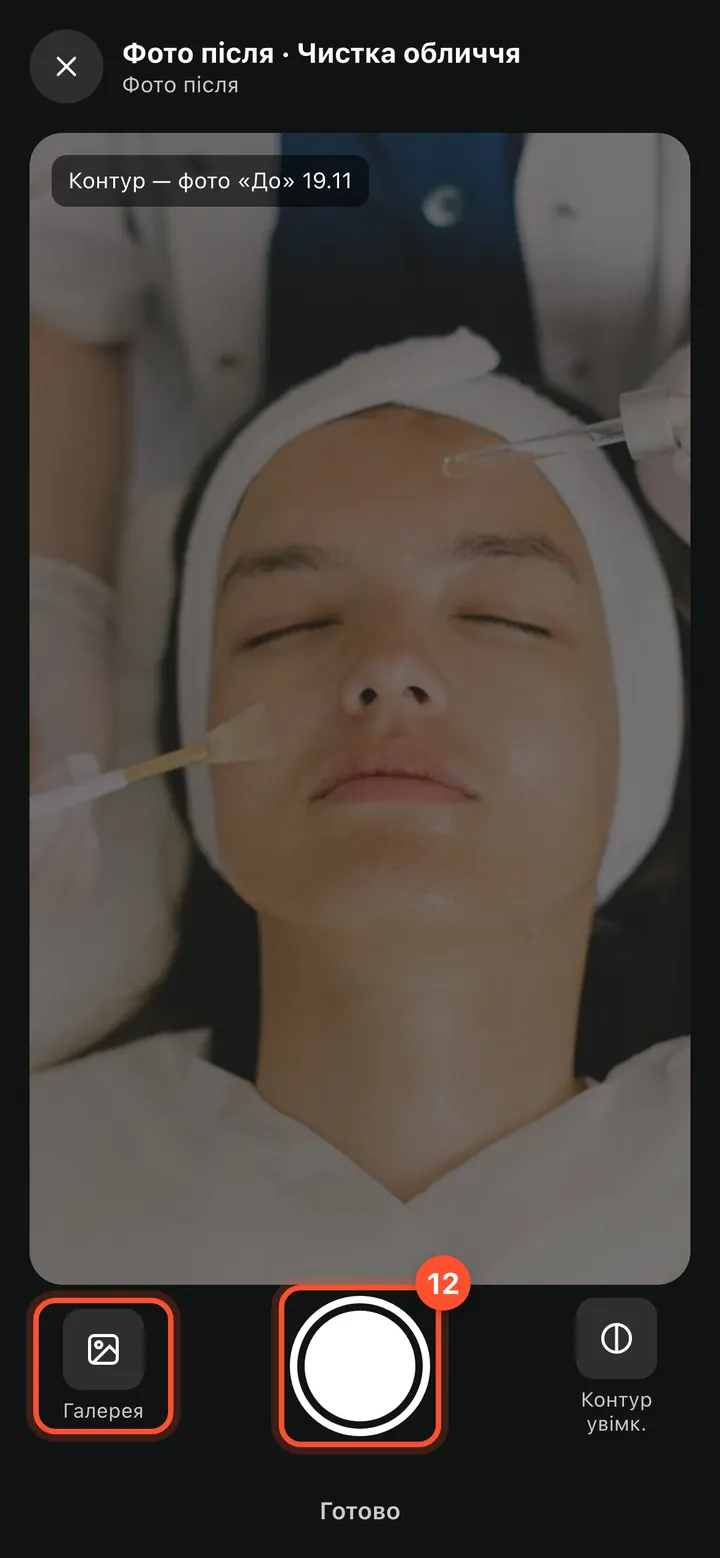
The camera shows the outline of the before photo — stand the same way and press the round button. “Gallery” takes a photo from your phone.
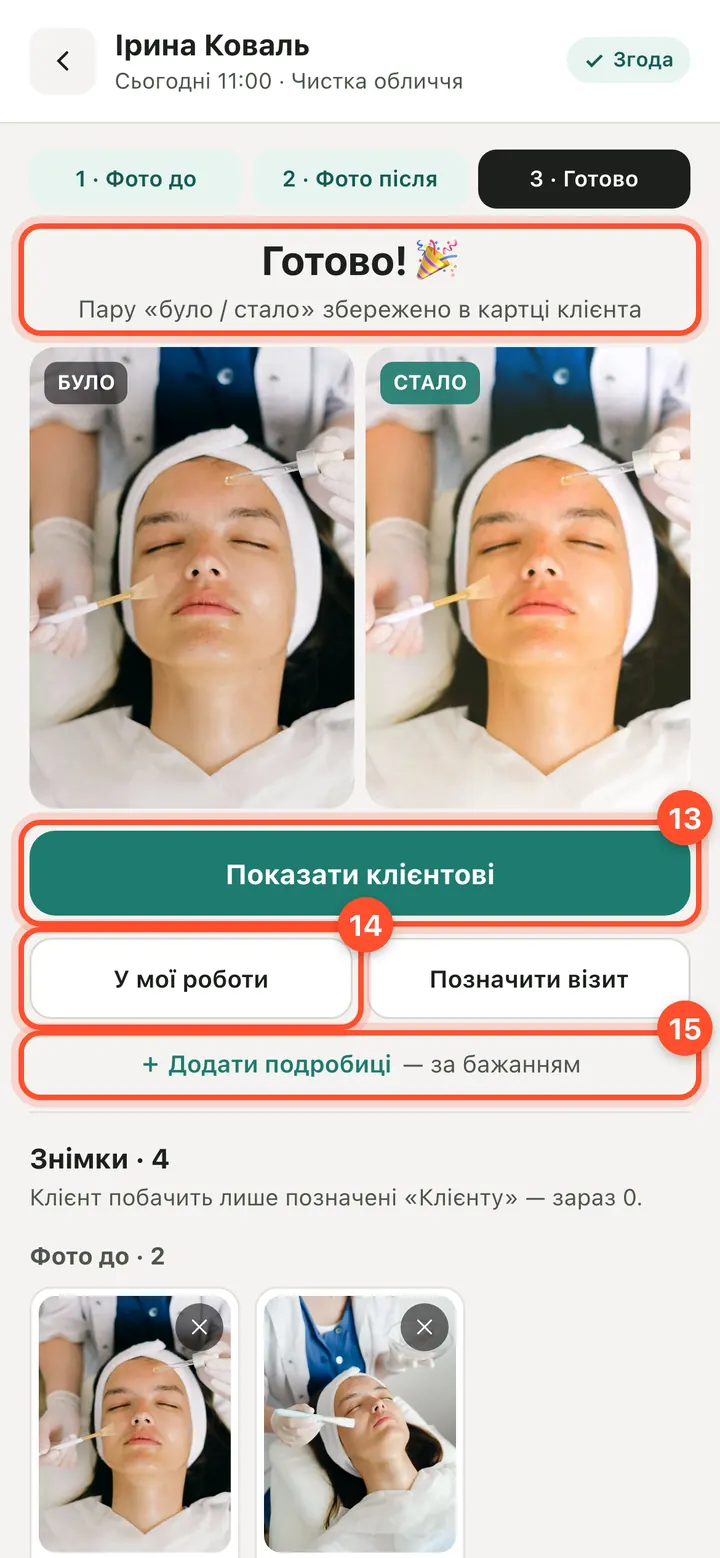
Step 3 — “Done!”. “Show to client” — before / after on the full screen. “Add to my works” — into your portfolio (if the client allowed it). “+ Add details” is optional: area, injections, check-up photo, note.
Several photos — the client sees only the ones you pick
One photo is often not enough. Take as many before and after photos as you need and show the client only the best ones.
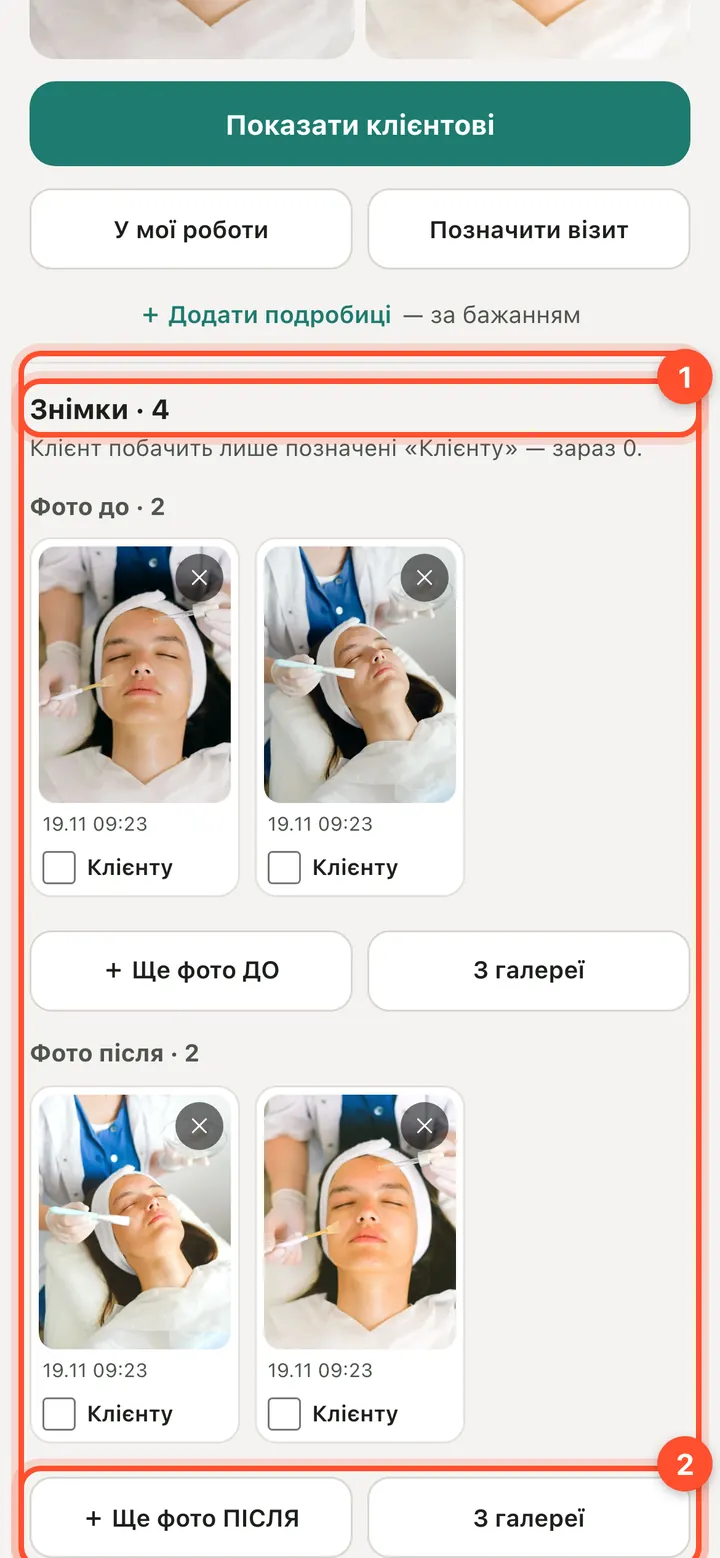
Under “Done!” there is the “Photos” block: “Photo before” and “Photo after” separately. To add more: “+ Another AFTER photo” from the camera or “From gallery” (several at once).
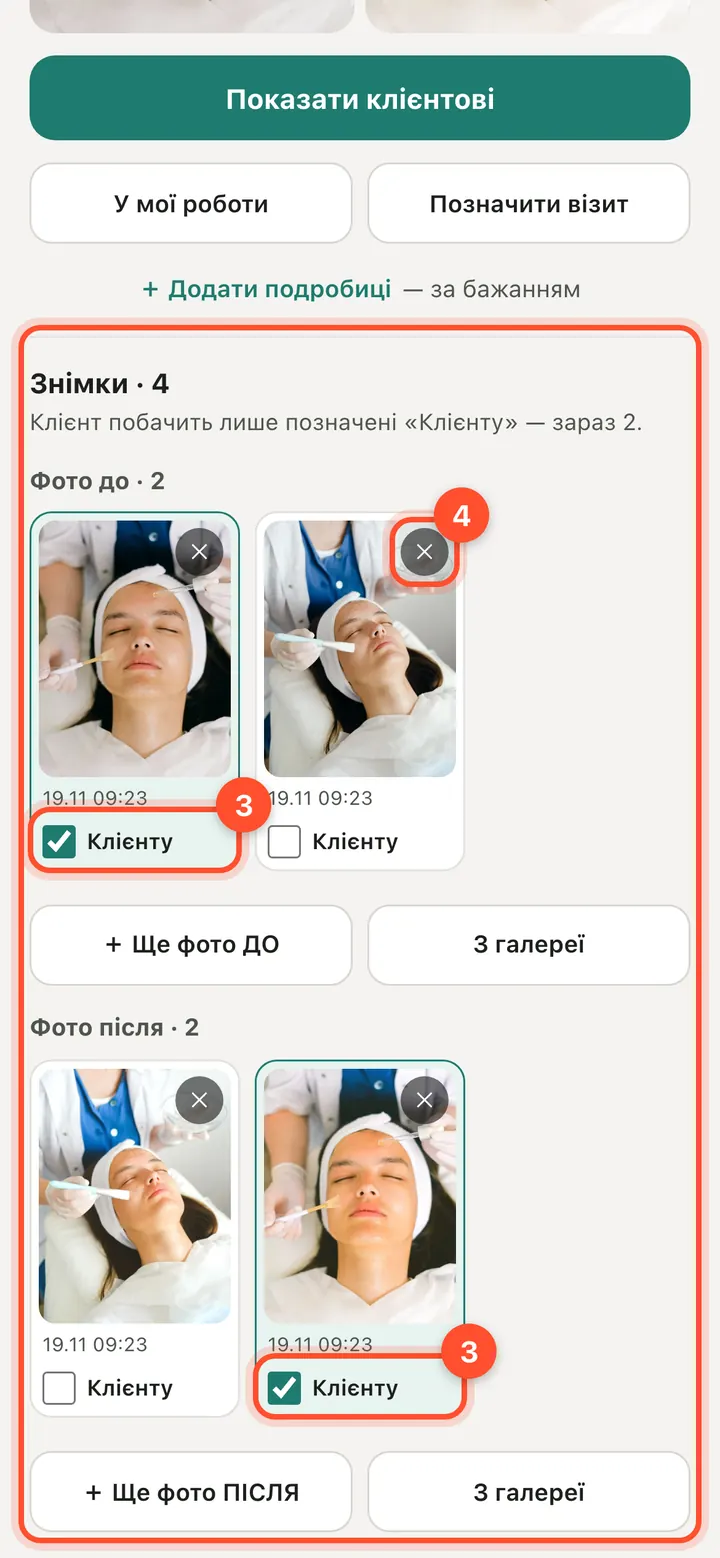
Every photo has a “To client” tick. It starts off: tick the ones you want to show. A bad shot — ✕.
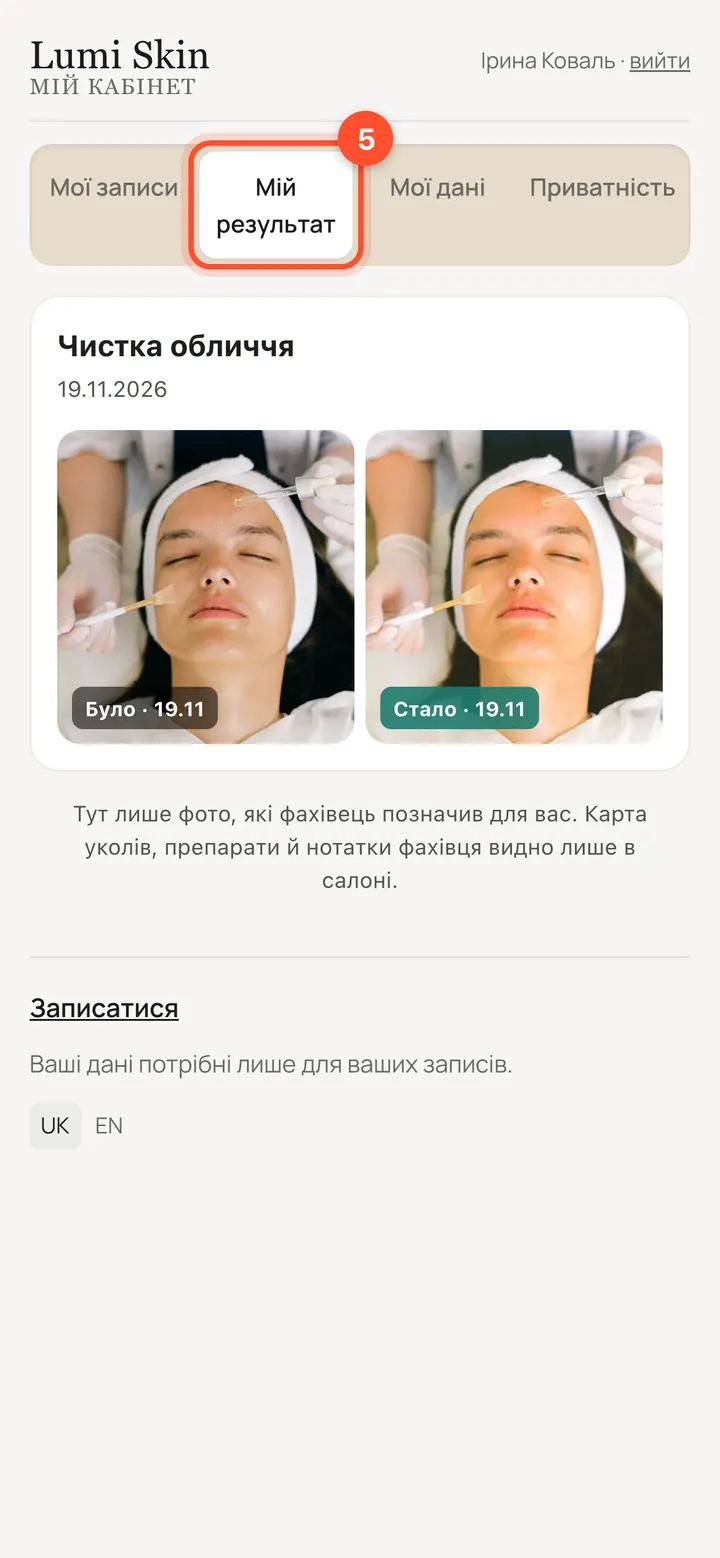
In her account on the salon website, on the “My result” tab, the client sees only the ticked photos. The rest stay with the salon.
Before / after, settings and portfolio
All optional: everything works without it.
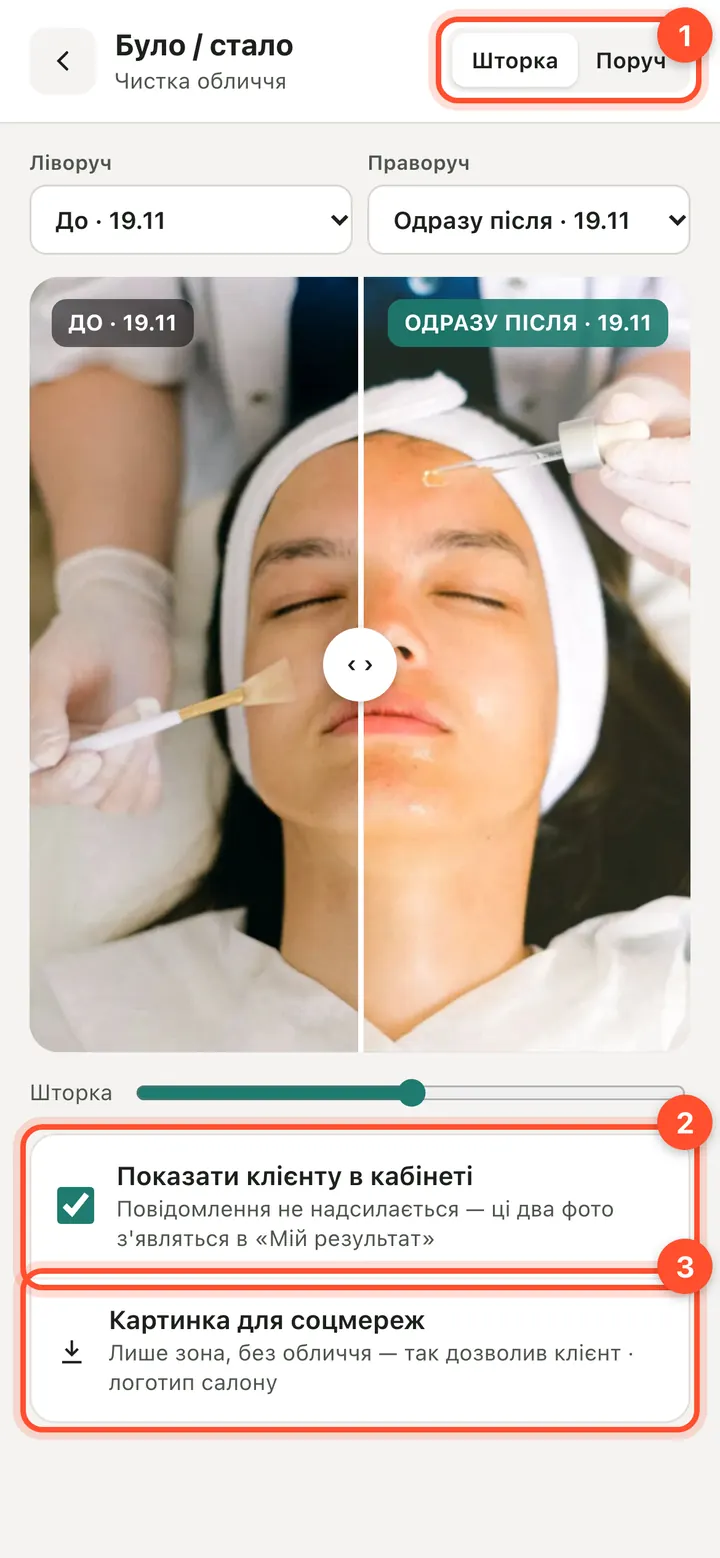
“Before / after”: “Slider” or “Side by side”, any two photos. “Show to the client in their account” ticks these two photos. “Picture for social media” — a ready image with the salon's name.
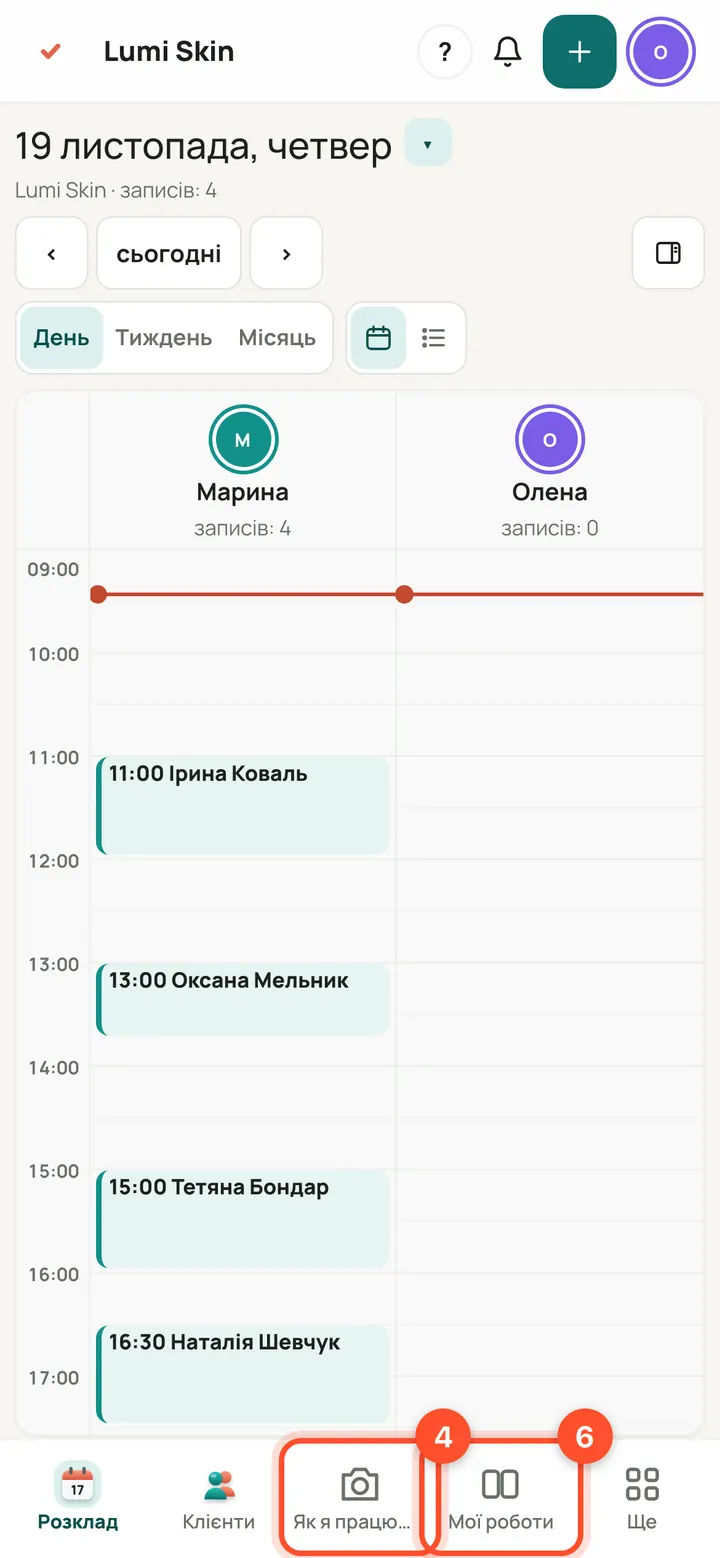
In the menu: “How I work with photos” and “My work”.
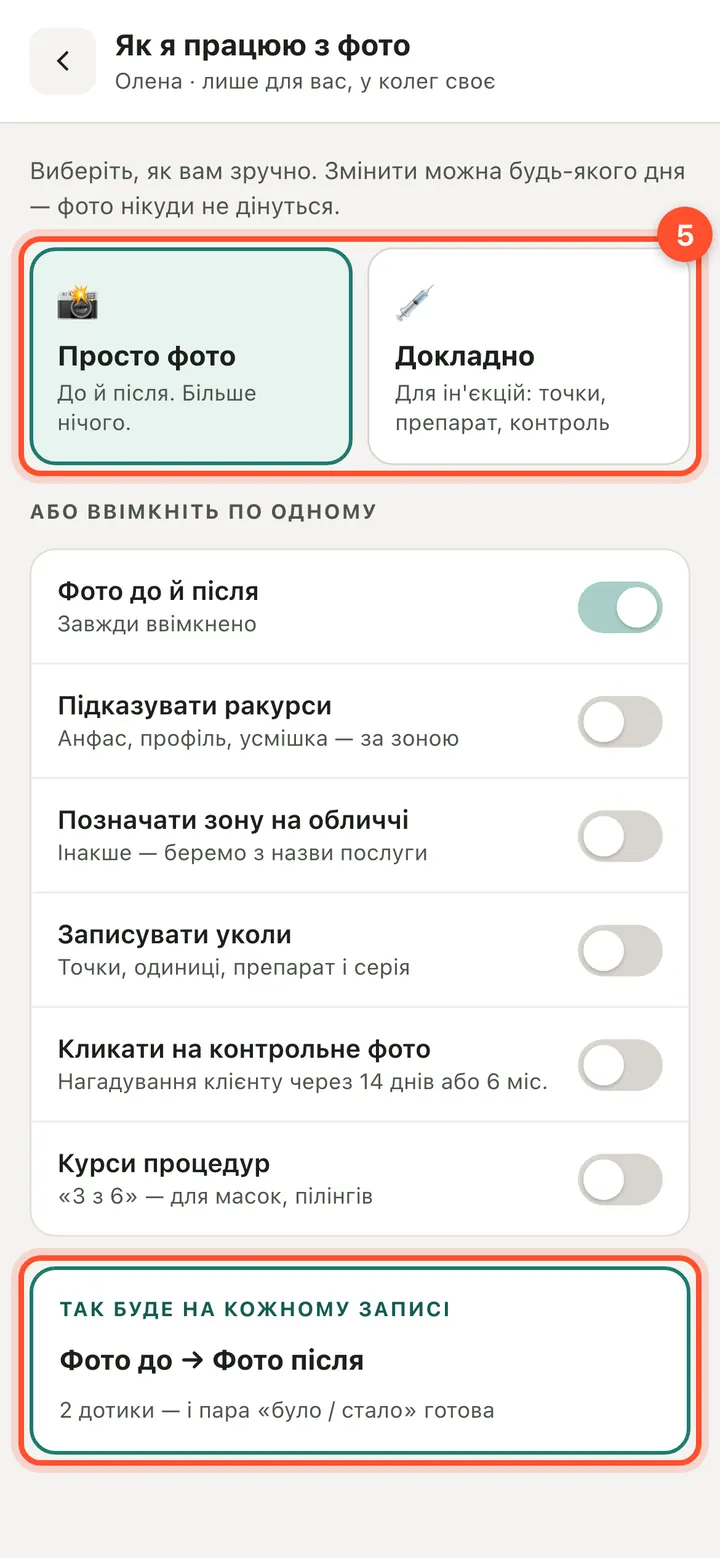
“How I work with photos”: “Photos only” — just before and after. “Detailed” — also angles, area, injections, check-up photo. Each specialist has their own.
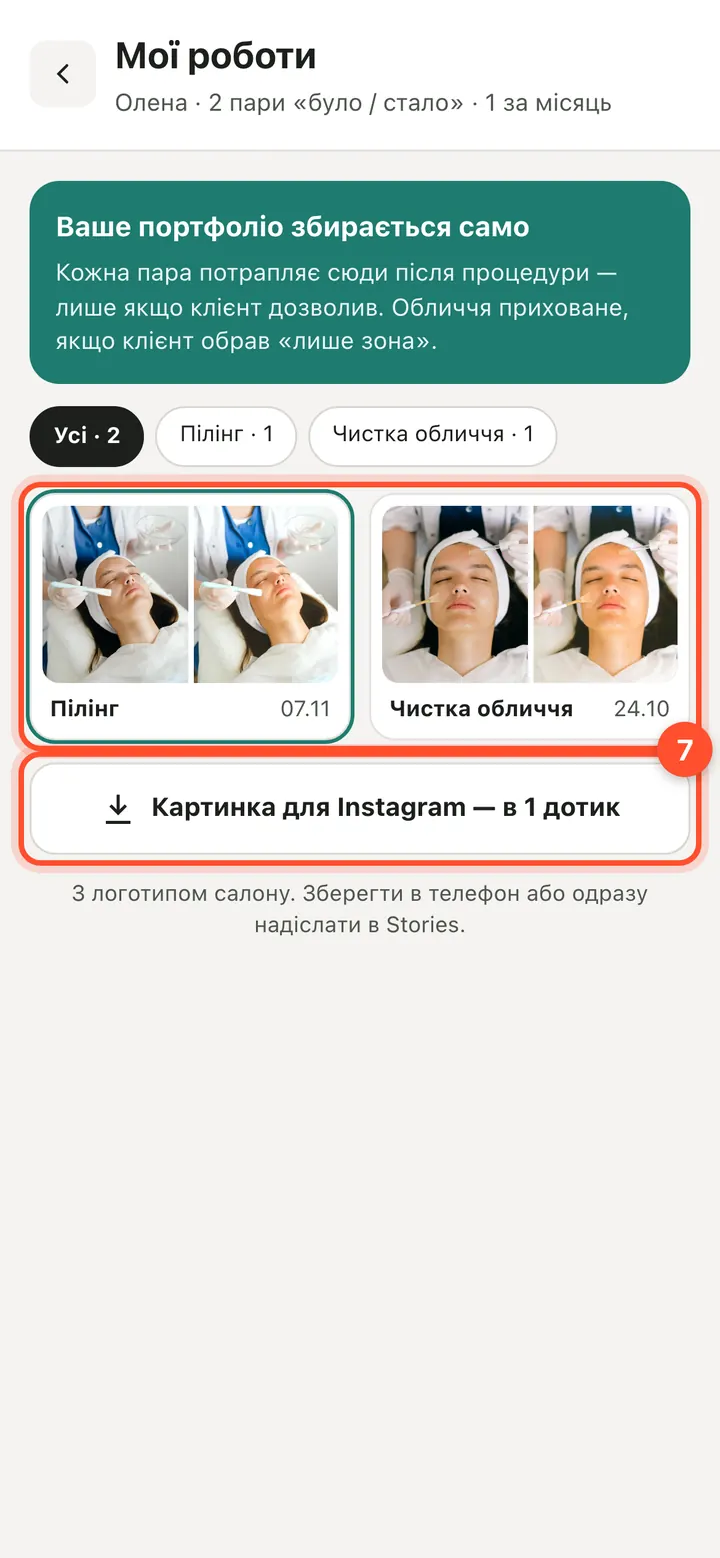
“My works” — your portfolio builds itself from the pairs you added with “Add to my works”. “Instagram picture — in 1 tap”.
Questions
Does the client see all the photos?
No. Only the ones you ticked “To client”, and only if the consent has “Show them to me in my account”. The ticks start off.
How many photos can I take?
As many as you need: “+ More BEFORE photos”, “+ Another AFTER photo” or “From gallery” — up to 20 photos at a time.
Do I have to fill in the details?
No. Before and after photos are already a complete record. Area, injections, check-up photo and note are optional, with “+ Add details”.
Where are all the client's photos?
In the client card, on the “Before / after photos” tab: every treatment with its before / after pair.